Blog

Cracker Barrel Biscuits Copycat Recipe

Would you like biscuits or cornbread?If you’re at a Cracker Barrel restaurant, the answer is yes and yes. Although my eyes and tastebuds always tend to favor the cracker barrel biscuits.They’re slightly salty with a pillowy soft interior just waiting to be slathered in butter.If you’re a fan of these southern style biscuits, you’re going to want to try this Cracker Barrel Biscuits Copycat Recipe.
Cracker Barrel Biscuits Copycat Recipe

- Ingredients
- 2 cups all-purpose flour
- 1 Tablespoon baking powder
- 1 Tablespoon granulated sugar
- 1 teaspoon salt
- 6 Tablespoons unsalted butter very cold (cut into cubes)
- ¾ cup milk (or buttermilk)
- For best results, chill your butter in the freezer for 10-20 minutes before beginning this recipe. It's ideal that the butter is very cold for light, flaky, buttery biscuits.
- Preheat oven to 425 degrees and line a cookie sheet with nonstick parchment paper. Set aside.
- In a food processor, combine flour, baking powder, sugar, and salt in a large bowl and mix well. Pulse 3 or 4 times to combine.
- Add butter to food processor. Pulse 6-8 times or until the mixture is resembles coarse crumbs.
- Add milk to the food processor and pulse 6-8 times or until the mixture starts coming away from the sides of the bowl.
- Transfer your biscuit dough to a well-floured surface and use your hands to gently work the dough together. If the dough is too sticky, add flour until it is manageable.
- Once the dough is cohesive, fold in half over itself and use your hands to gently flatten layers together. Rotate the dough 90 degrees and fold in half again, repeating this step 5-6 times but taking care to not overwork the dough.
- Use your hands (do not use a rolling pin) to flatten the dough to 1" thick and lightly dust a 2 ¾" round biscuit cutter with flour.
- Making close cuts, press the biscuit cutter straight down into the dough and drop the biscuit onto your prepared baking sheet. Repeat until you have gotten as many biscuits as possible and place less than ½" apart on baking sheet.
- Once you have gotten as many biscuits as possible out of the dough, gently re-work the dough to get out another biscuit or two until you have at least 6 biscuits.
- Bake on 425 degrees for 12 minutes or until tops are beginning to just turn lightly golden brown.
- If desired, brush with melted salted butter immediately after removing from oven. Serve warm and enjoy.
More Bread Recipes You'll Want to Try
Moist Banana BreadThe Best Sweet Cornbread RecipeWarm Bread Pudding with a Brown Sugar Rum Sauce If you liked this video, be sure to SUBSCRIBE to my YouTube Channel!
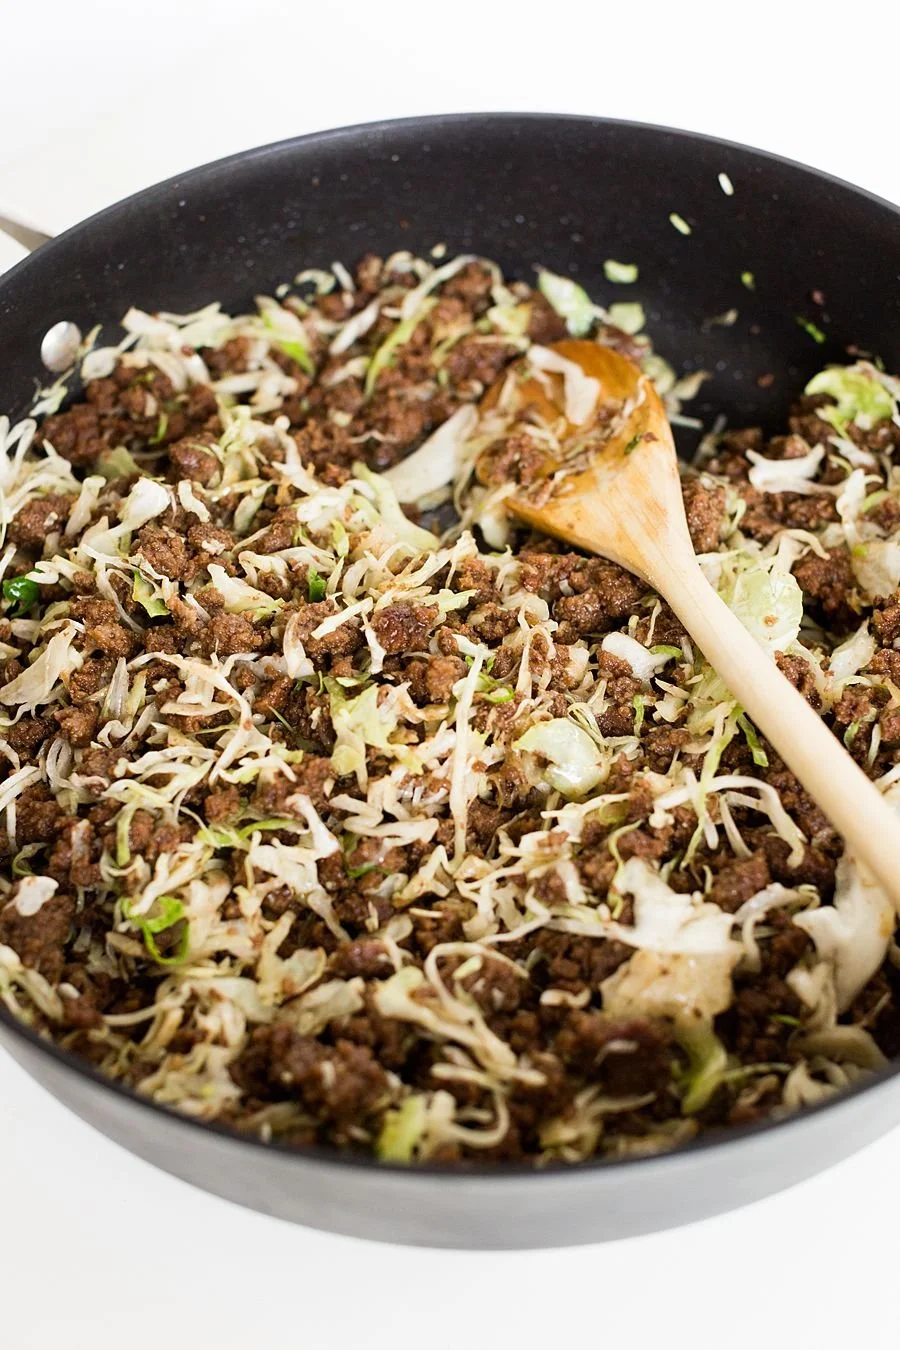
Korean Ground Beef Egg Roll Bowls

This recipe started off as Korean ground beef egg rolls, but then I realized my wonton wrappers were expired. So a Korean ground beef eggroll bowl it is!
Korean Ground Beef Egg Roll Bowls

- 2 pound lean ground beef
- 2 Tablespoons sesame oil
- 6 cloves garlic (minced)
- 2 teaspoons ground ginger
- 1 cup brown sugar
- 1/2 cup lite soy sauce
- 1 Tbsp Sriracha (use less if you don't like spice!)
- 10 oz bag of coleslaw veggie mix
- Heat a large pan over medium high heat. Brown the meat with sesame oil, garlic and ginger.
- Drain 75% of the fat, add brown sugar, soy sauce, and Sriracha. Cook until the liquid has reabsorbed and the meat is shiny but not soupy.
-
Add the coleslaw veggies to your pan. Heat through until they just wilt.
If making into eggrolls:
In sets of 4 lay out your egg roll wrappers. Add two tablespoons of beef. Wet the sides with water using your finger. Fold the sides in and wet the folded in sides. Roll closed like a burrito and set aside until you finish all 24. Freeze on a cookie sheet or tray without them touching each other. From frozen, fry for 3-4 minutes in 350 degree oil. Drain on drying rack to prevent sogginess or the egg rolls sitting in oil.
More Recipes For Easy Weeknight Dinners:
Salisbury steakOne Pan Creamy Tuscan Chicken PastaOne Pan Chicken Spaghetti If you’d like to see more recipes like this, be sure to SUBSCRIBE to my Youtube channel!
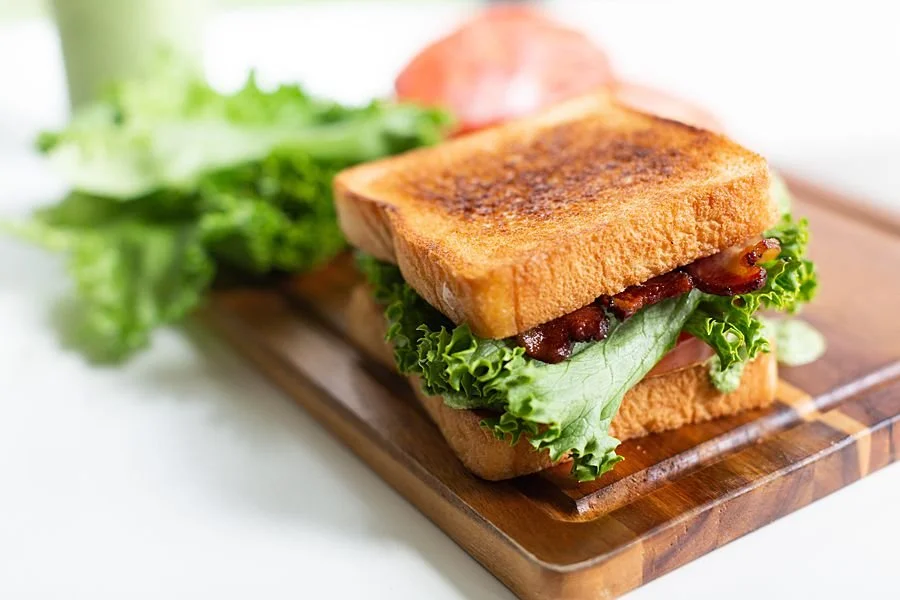
How to Make The Ultimate BLT Sandwich Recipe

How does one improve upon a classic sandwich like the BLT?The classic bacon, lettuce, and tomato sandwich is an icon in the sandwich world. Hole in the wall diners and upscale restaurants all feature their own version of this famous sandwich, but none that I’ve tried come even remotely close to this ultimate BLT sandwich recipe.
This tasty bacon sandwich is easy to make and has one shining star – the Amazon sauce. Instead of regular old mayo, the ultimate BLT sandwich has this amazing delicious jalapeno cilantro sauce on it.The jalapeno cilantro sauce is only as spicy as you want, but it has a ton of flavor and packs a punch that pairs perfectly with the salty bacon. You’re going to love it!
The Ultimate BLT Sandwich Recipe

Amazon Sauce Ingredients
- 3 jalapeños
- 1 bunch fresh cilantro
- 5 medium cloves garlic
- 1/2 cup mayonnaise
- 2 tbsp fresh lime juice
- 2 tbsp avocado oil
- 1/2 tsp sea salt
- 1/4 tsp freshly ground black pepper
Sandwich Ingredients
- 2 slices Texas toast
- 3-6 slices bacon
- 1 leaf Lettuce
- 1 slice tomato
- 2 tablespoons butter
Making the Sauce
- For a milder sauce, remove the seeds and ribs from the jalapeños, then roughly chop them. For a spicier sauce, leave the seeds and ribs in, and simply chop the jalapeños. You should have about 1 cup of chopped jalapeños.
- Place the jalapeños into a blender along with all the remaining ingredients (I even include the cilantro stems), and blend on high for at least 30 seconds, until the sauce is smooth and creamy.
- You can store in the refrigerator for up to 1 week.
Putting the Sandwich Together
- Preheat the oven to 350 degrees. On a baking sheet with raised sides, cover the bottom with foil and place your bacon in one even layer on top. Place another sheet of foil loosely on top of the bacon (this will keep it from splattering grease all over the oven). Let bake for 25-30 minutes, depending on how crispy you like your bacon.
- Heat a griddle or skillet to medium high heat (350 degrees). Once it’s hot, put the tablespoon of butter on the griddle and use a spatula to spread it out. Once it’s melted, place the slices of Texas toast on top of the buttered area. After it becomes golden brown (about 3 minutes), flip the bread and toast the other side.
- Spread a generous amount of the Amazon Sauce over one piece of toast. On top of it, lay the slice of tomato, and then the lettuce. Place the slices of bacon on top of the lettuce and then the other piece of toast on top.

Utensils Needed
More Lunches You’ll Love
Italian Tuna Stuffed TomatoesEasy & Colorful Pasta SaladFig & Feta Flatbread If you’d like to see more recipes like this, subscribe to my Youtube Channel!
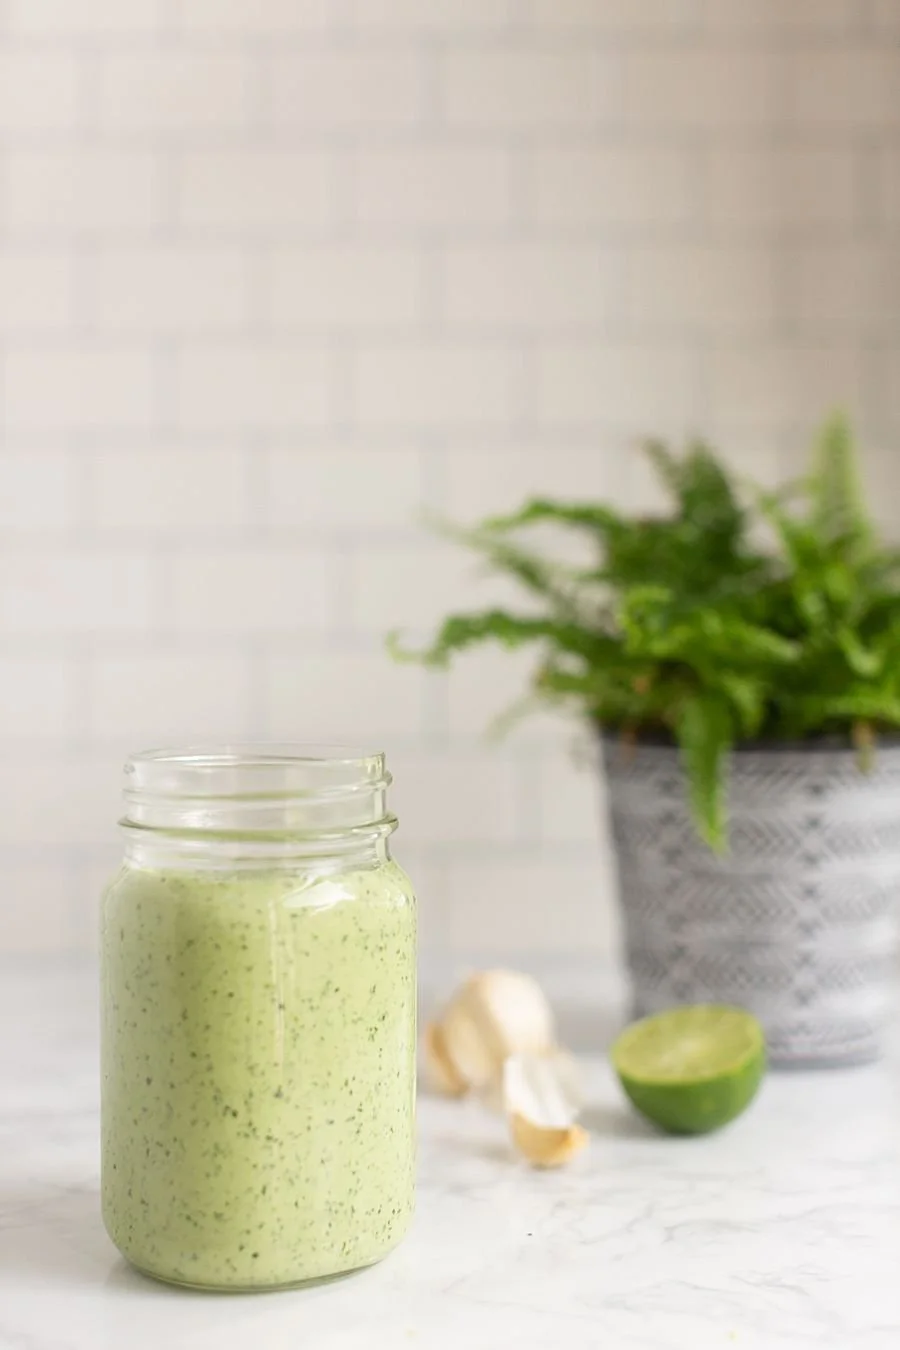
Gringo's Tex Mex Copycat Amazon Sauce

Move over, chips and queso!So there’s this Tex-Mex restaurant near where we live called Gringo’s. My family has been going there for *literally* decades. Now they have multiple stores all across Texas, but I still remember eating at that first little restaurant of theirs. The food is out of this world good. Their fajita chicken is just as flavorful as their beef fajita and they always have the greatest quality. You always know what you’re going to get and I like that in a restaurant.One menu item I have ordered a lot in the past is called an Amazon Wrap. It’s a spinach tortilla loaded with fajita chicken, lettuce, tomato, and Amazon sauce.Now, this is no ordinary sauce!
This green sauce is everything you want in a Tex-Mex offering – loads of flavor with a taste you just can’t quite put your finger on why it is that you love it so much.Jalapeno and cilantro are the stars of this show. And what I love most about this Gringo’s copycat Amazon sauce is that you can make it as spicy or as mild as you like – just by including the seeds and ribs or not.Ready to make some for yourself? It couldn’t be easier! No heat required – just throw everything in the blender and enjoy!Let’s get started…
Gringo’s Copycat Amazon Sauce Recipe

- 3 jalapeños
- 1 bunch fresh cilantro (2oz)
- 5 medium cloves garlic (1.5 tbsp)
- 1/2 cup mayonnaise
- 2 tbsp fresh lime juice
- 2 tbsp avocado oil
- 1/2 tsp sea salt
- 1/4 tsp freshly ground black pepper
- For a milder sauce, remove the seeds and ribs from the jalapeños, then roughly chop them. For a spicier sauce, leave the seeds and ribs in, and simply chop the jalapeños. You should have about 1 cup of chopped jalapeños.
- Place the jalapeños into a blender along with all the remaining ingredients (I even include the cilantro stems), and blend on high for at least 30 seconds, until the sauce is smooth and creamy.
- Store in the refrigerator for up to 1 week. Enjoy!

Utensils Needed
More Sauces & Dips You’ll Love
Goat Cheese LogCarrabba’s Copycat Italian Herb DipLayered Taco Dip If you’d like to see more recipes like this, subscribe to my Youtube Channel!

Candied Bacon Deviled Eggs

Bacon and eggs has never tasted so good.I have found that deviled eggs are one of those things that people either love them or hate them. I am definitely in that first “love them” camp.I think that The hardest thing about making deviled eggs is getting the shell off of the boiled egg. It’s always the most time-consuming and frustrating part of the whole process, isn’t it? Once I figured out how to get the shell off an egg cleanly every single time by using an egg cooker (see below for the one I use), my world has officially changed. I had tried boiling them, baking them in the oven, you name it but I could not get them to cook to the right done-ness or get those dang shells off without ripping the eggs apart.So once they are steam to perfection and the shells come off cleanly, that’s when the magic starts. But the real winner in this recipe is the candied bacon on top. There’s something about that salty sweet goodness on top of the tangy egg yolk mixture that just makes this recipe sing.It is so dang good.Ready to try it for yourself? Let’s get it started.
Candied Bacon Deviled Eggs Recipe

Candied Bacon
- 5 slices thick cut bacon
- 2 tablespoons brown sugar
- pepper (to taste)
Deviled Eggs
- 18 large eggs
- 1/3 cup mayonnaise
- 3 teaspoons Dijon mustard
- 3 teaspoons apple cider vinegar
- green onions
For the bacon
- Preheat the oven to 400 degrees.
- On a foil lined baking sheet, place your strips of bacon and sprinkle the brown sugar over the bacon. Add pepper to taste as well.
- Place another sheet of aluminum foil over the top of the bacon and place another baking sheet on top of it (this will keep the bacon from wrinkling up and will stay flat).
- Bake for 20 minutes.
For the deviled eggs
- Boil the eggs and let cool.
- Once the eggs have cooled completely, peel them and slice in half lengthwise. Remove the yolk to a small bowl with a spoon and place the egg whites on a plate.
- Mash the yolks with a fork and add the mayonnaise, mustard, vinegar, salt and pepper. Stir everything together until it's smooth.
- Put the mixture into a zip top bag and cut the tip off in order to make a make-shift pastry bag. Squeeze the mixture back into the hole of each egg white. Sprinkle green onions on top for garnish.
- Tear apart (or slice) bacon into 1 inch pieces and place on top of each egg.

Products Used
More Brunch Recipes You'll Love
Blood Orange Prosecco MuleEggwhite FrittataProtein Packed Yogurt BowlIf you'd like to see more recipes like this, subscribe to my youtube channel!

Perfect for Snacking Pretzel Bites

If ever there was a time for snacking, the time is now.And the answer for "what should I eat?" is definitely these soft pretzel bites.
Who Ate My Quarantine Snacks?
Covid-19 has left us all stuck in our homes and held captive by our snacks. Here on the Texas Gulf Coast, we only know one way of preparing to stay put for a while - and that's "hunkering down" hurricane style, i.e., with plenty of bottled water, toilet paper, and packaged sweets and chips that will stay good for a while.Most of the time, those snacks are gone in the first few days. And that might be the case for you in quarantine now too. But this season of staying home is much different than those hurricane-like days in the past. It's been an endless array of groundhog days were every day seems to feel exactly like the day before - and we still have electricity and running water (thank the Lord!).So with every day feeling like the next, it's that much more important to keep our spirits up with cheap entertainment. In our house, that means going outside to explore and cooking.
Cooking is Interactive Learning!
Yesterday, that meant my daughter and I got in the kitchen and made some soft pretzel bites. My kids love pretzels and these soft ones are perfect straight from the oven. We pretended the dough was Play Doh and made long skinny "snakes" of dough and after they were cut into bite-size pieces, she"painted" the pieces with egg wash.This recipe makes approximately 120 pretzel bites and I can guarantee you that they will all be gone in a day. Or if you serve them when you have a party, they will most definitely be a hit!
Soft Pretzel Bites Recipe
Pretzel Bites

The perfect salty snack for any party or afternoon munch session are these soft pretzel bites. They're fresh bread dough topped with coarse salt and served with a cheddar cheese sauce!
Soft Pretzels:
- 1 1/2 cups warm water
- 2 tablespoons light brown sugar
- 1 package active dry yeast ((2 1/4 teaspoons))
- 3 tablespoons unsalted butter (melted)
- 2 1/2 teaspoons salt
- 4 1/2 cups bread flour (or all purpose)
- Vegetable oil
- 3 quarts water
- 1/3 cup baking soda ((for boiling the pretzels))
- 1 whole egg beaten with 1 tablespoon cold water
- Coarse sea salt
Cheese Sauce:
- ½ Tablespoon unsalted butter
- ½ Tablespoon all-purpose flour
- ½ cup milk
- 8 ounces Cheddar cheese (grated)
For the Pretzels:
-
Combine the 1 1/2 cups water, sugar, yeast, and butter in the bowl of a stand mixer and mix with the dough hook until combined. Let sit for 5 minutes.

- Add the salt and flour and mix on low speed until combined. Increase the speed to medium and continue kneading until the dough is smooth and begins to pull away from the side of the bowl, about 3 to 4 minutes. If the dough appears too wet, add additional flour, 1 tablespoon at a time. Remove the dough from the bowl, place on a flat surface and knead into a ball with your hands.

- Oil a bowl with vegetable oil, add the dough and turn to coat with the oil. Cover with a clean towel or plastic wrap and place in a warm spot until the dough doubles in size, about 1 hour.

- Preheat the oven to 425 degrees F.
- Bring the 3 quarts of water to a boil in a small roasting pan over high heat and carefully add the baking soda. It will boil over, so add slowly and be careful!
-
Remove the dough from the bowl and place on a flat surface. Divide the dough into 8 equal pieces, about 4 1/4 to 4 1/2 ounces each. Roll each piece into a long rope measuring 22 inches and shape. Cut the dough into one inch pieces to make the pretzel bites. Boil the pretzel bites in the water solution in batches.

-
We did about 15 bites at a time. Boil for about 30 seconds. Remove with a large slotted spoon. Place pretzel bites on a baking sheet that has been sprayed with cooking spray. Make sure they are not touching. Brush the tops with the egg wash and season liberally with the salt. Place into the oven and bake for 15 to 18 minutes until golden brown.

- Remove to a baking rack and let rest 5 minutes before eating. Serve with cheese sauce.
To make the Cheese Sauce:
-
Melt the butter in a medium saucepan over medium heat. Add the flour and cook 1 minute. Whisk in the milk and cook until slightly thickened. Remove from heat and stir in the Cheddar cheese until smooth and all of the cheese is melted. Season with salt and pepper, to taste.
*If you want to make cinnamon and sugar pretzel bites-instead of adding salt, sprinkle the bites with cinnamon and sugar. For the frosting mix-soft cream cheese-about 3 T, powdered sugar, a teaspoon of vanilla extract, and a little bit of milk. Whisk together. Add more milk if it is too thick, if it is too thin, add more powdered sugar. I don't measure. I just guess until the consistency is right.*

Products Used:
If you'd like to make the traditional twist soft pretzels, check out the recipe here.[activecampaign form=1]
Springtime Protein Packed Yogurt Bowl
This post is sponsored by Randalls. All photos and opinions are mine and should not be used without written permission.
After a dreary Winter, I am really loving the weather during this sunny Spring! Spring time to me means eating outdoors, fresh seasonal food, and enjoying that glorious sunshine! So when some girlfriends of mine wanted to get together for a garden party (pre-quarantine), I said yes so fast they weren’t ready for it!As the writer of a food blog, I knew I was going to be bringing my A game to this themed party. I’ve been trying to eat healthier lately, so I felt like keeping the menu light was definitely the way to go. I couldn’t decide if I wanted to do gluten free, plant based, or just include ingredients that promote relaxation, so I decided to do all of the above!
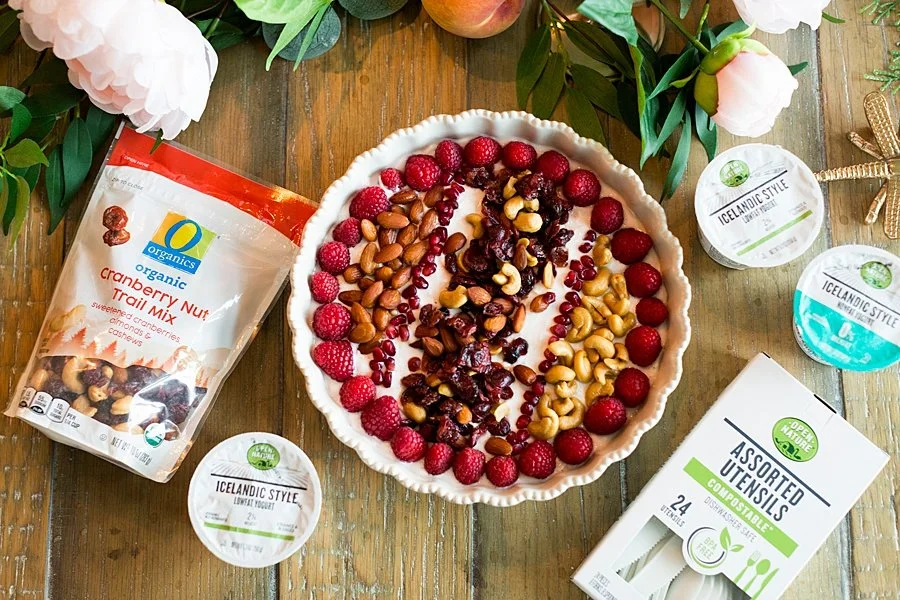
First up is this protein-packed power bowl. This healthy bowl is packed full of pro-biotics, fresh fruits, and healthy fats - so what’s there not to like? But the best part is that it’s easy to make but it looks like a million bucks.What I like about this recipe too is the versatility. You could easily make this yogurt bowl as individual plated portions, serve it family style, or even create a yogurt bar complete with all the toppings so your guests/family members can mix and match their own ingredients.
What’s in a Power Bowl?
I’m going to let you in on a little secret...power bowls include whatever you want to put into it.But they also typically have lots of protein, good fats, nuts, and are generally good for you.So for this specific power bowl, I wanted it to have fresh ingredients, be low in fat, and be packed with flavor. Here’s what’s in my bowl:
Open Nature Icelandic Yogurt, Mixed Berry Acai Flavor
Part 2% and part skim milk, this sweet yogurt contains a plethora of fruits such as strawberries, raspberries, blackberries, and acai. Not only is that color perfection, but the flavor is as well. I hate boring yogurt and this flavor is anything but boring!
Open Nature Icelandic Yogurt, Vanilla Flavor
This lowfat yogurt is made with 2% milk, so it’s perfectly creamy with just the slightest hint of vanilla. It made for a great contrast with the mixed berry acai yogurt I added it to, but I’m sure it would be equally as delicious on its own.
Pomegranate seeds
After cracking open a hard, red pomegranate, you’ll find these gems. These crunchy black seeds are encased in sweet red juice and are a great texture contrast to the smooth and creamy yogurts. They have tons of antioxidants and fiber too, so they’re perfect for digestive health.
O Organics Trail Mix Cranberry Nut
I hate a trail mix that is nothing but granola, so this trail mix rates pretty high for me (there’s no granola in it whatsoever). It’s got crunchy almonds, cashews, and tangy dried cranberries in it, so it really does make your tastebuds do a little dance.
Raspberries
Packed with Vitamin C and E, raspberries are great for brain health. Plus, they taste good - even if you just eat them off of your fingers like my daughter does.
Where do I Find the Ingredients?
I purchased all of my O Organics® and Open Nature® ingredients for this power bowl at my local Randalls.They also carry these brands exclusively at all of the Albertsons Companies family of stores, including ACME Markets, Jewel-Osco, Vons, Pavilions, Tom Thumb, Shaw’s, Star Market, United Supermarkets, and Carrs/Safeway. You can visit Albertsons.com or randalls.com to find a store near you. And while you’re there, be sure to check out their meal prep tips and recipe ideas as well!The best part about shopping at my local Randalls is the online savings. I love creating my shopping list online, adding my digital coupons, and making things easier on myself for when I’m actually in the store (especially if I have the kids with me).While I’m not spending much time in store lately, Randalls has made some awesome accommodations to their shopping experience - like special shopping hours for seniors and keeping the shelves stocked.
Ready for the recipe?
Protein-Packed Power Bowl
This healthy bowl is packed full of pro-biotics, fresh fruits, and healthy fats - so what’s there not to like? But the best part is that it’s easy to make but it looks like a million bucks.
- 4 containers Open Nature Icelandic Yogurt Mixed Berry Acai
- 1 container Open Nature Icelandic Yogurt (Vanilla)
- ½ package O Organics Trail Mix Cranberry Nut
- 1 pint Raspberries
- 2 oz Pomegranate gems
- Open the yogurt containers and pour the content of them into your bowl. You can use as much or as little as you like of each (I used mostly Mixed Berry Acai Open Nature Icelandic Yogurt with just a dollop of Vanilla Open Nature Icelandic Yogurt).
- Add the fruits and trail mix however you like (I, of course, had to make a design, but that’s totally up to you).
- Enjoy!
 Now, when you’re eating your good-for-you yogurt bowl, make sure to use your good-for-the-planet cutlery! These Open Nature® Compostable Spoons are perfect for a garden party or just a night eating around the dinner table. Since they’re made out of a plant-based material, you can enjoy these use and toss spoons and not feel guilty about adding to a landfill somewhere.
 This garden party had everything I love in it - food, flowers, and good friends. I just love the freshness of this time of year!If you’d like to see more Spring recipes like this, follow me on Facebook!
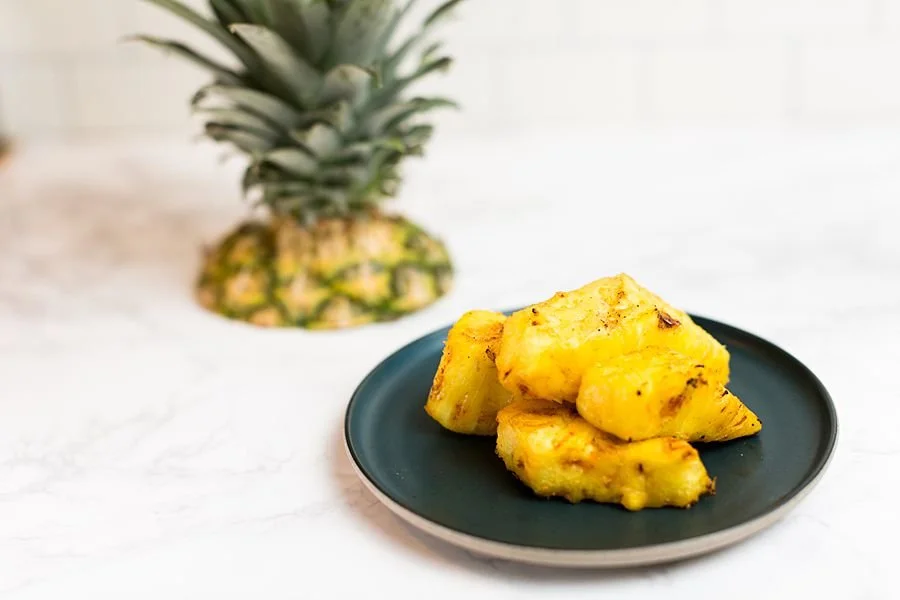
Spicy Grilled Pineapple

This post contains affiliate links. All photos and opinions are mine alone and should not be used without written permission.
Meal Planning
Lately I've been really trying to plan out what we're going to have for dinner in advance. On one day a week - usually Sundays, I plan out what we're going to have for dinner the rest of the week. I take into account what activities we have that day and how much time I actually have to spend in the kitchen. At the same time, I write out the grocery list and make sure I have all of the seasonings I need. I like using my HEB app on my phone to make my grocery list because it puts every item on the list categorized by aisle number, so I'm not going to be criss-crossing across the store. I'm not sure if other grocery stores have that, but that's where I shop and it's a huge plus for me that the app has that feature!
Here's what last week's menu looked like:
Last Week's Menu
Sunday - Chicken Enchiladas, Rice, and Charro BeansMonday - Spaghetti & Garlic BreadTuesday - Fish TacosWednesday - Chicken & DumplingsThursday - Texas HashFriday - Chicken FettuccineSaturday: King Ranch Casserole
If you're interested, I got the recipe for the chicken enchiladas, chicken and dumplings, chicken fettuccine, and king ranch casserole all from the Magnolia Table cookbook and can vouch that they're all amazing and were gobbled up. (and now there's a second one coming out? I need it!)
Taco Tuesday
So on Tuesday, tacos were on the menu and I thought, why not add a pineapple relish on top? So I bought a fresh pineapple along with the rest of my groceries. I like prepping my ingredients all at once, so while I was coring the pineapple, I thought, why not grill it? Flavors of fruits are always so much more enhanced when they're grilled, so why not grill it before I chop it and add it to my tacos? So I marinated the pineapple and got it ready for the next day - Taco Tuesday.After marinating overnight, the pineapple chunks went on the grill. Y'all, the smell of that sweet pineapple hitting the grill was like Heaven to my nose. Holy moly! I knew as soon as I smelled it that I was going to have to try a bite as soon as I was done grilling it.
We have a situation on our hands.
The pineapple came off the grill and I took a bite. At first, it was that familiar, sweet taste of pineapple, but then the cayenne kicked in just at the end, giving it just the right amount of heat. So good. Like, so so good. I called for my husband to come over and try a bite and soon it was all gone. We devoured that whole dang pineapple before it ever even touched a taco. Now, even as I write this, my mouth is watering for me to make it again. And I will very soon - you can bet on that!So I guess the right thing for me to do now is to give you the recipe, huh? If I must....but don't say I didn't warn you when I say that this pineapple doesn't last off the grill long!
Uses for Grilled Pineapple
You could easily make this spicy grilled pineapple in slices to put on a teriyaki burger, in chunks to serve alone as an appetizer, paired with vanilla ice cream for dessert, or (if you can restrain yourself better than I can) as a pineapple slaw to top your tacos. Or how about a refreshing pineapple margarita? Now that I think about it, the possibilities are endless when it comes to this grilled pineapple recipe! Maybe I should find a support group...
Spicy Grilled Pineapple

Sweet and juicy pineapple has a little kick of heat for the perfect summer treat.
- 1 pineapple (peeled, cored, and sliced)
- 1/4 teaspoon honey
- 3 tablespoons butter (melted)
- 1 teaspoon cayenne pepper
- 1/8 teaspoon salt
-
Combine the honey, butter, cayenne pepper and salt in a resealable plastic bag.

-
Place the pineapple in the bag, seal it, and toss it to coat evenly. Let marinate for at least 30 minutes (or overnight)
-
Grill pineapple for 2 to 3 minutes per side, or until heated through and grill marks appear.

Products Used
If you'd like more recipes like this, follow me on Pinterest!
[activecampaign form=1]
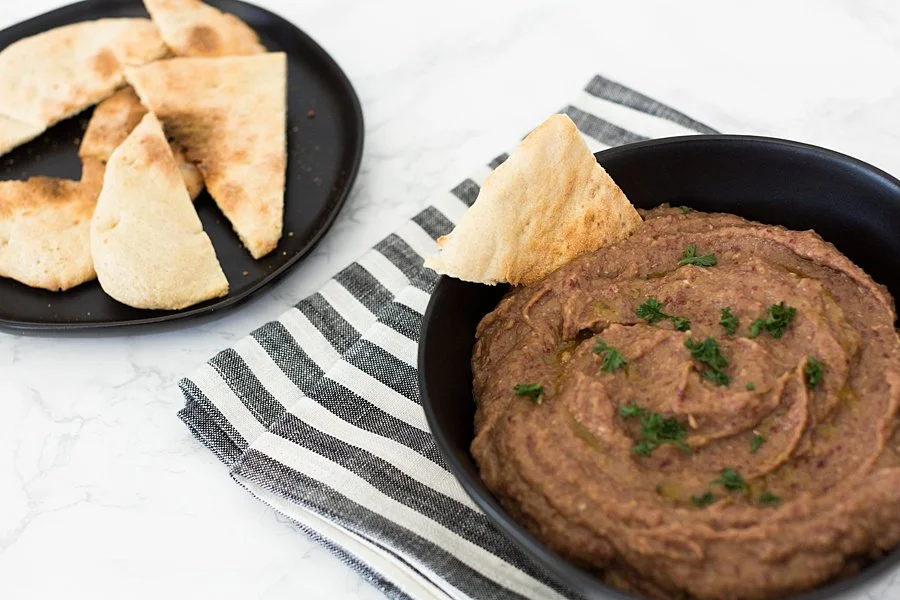
Red Bean Hummus

This post contains affiliate links and is sponsored by Flavor Your Life. All photos and opinions are mine and should not be used without permission.
There are a few things that I always have ready in my pantry. A selection of spices, baking supplies, and a good quality European Extra Virgin Olive Oil are always on hand.
What is EVOO?
Extra Virgin Olive Oil comes from the fruit of an Olive tree. It's made by pressing the fruit without using heat or chemicals. Olive Oil is qualified as "Extra Virgin" when it has lower peroxide values. Lower peroxide levels indicate a fresher oil and a faster processing time. In addition to this, oils must be judged by expert tasters that will deem it as a higher quality.
Why European EVOO?
Olive trees all over Europe are revered for the "liquid gold" they produce. Farmers there have spent hundreds of years cultivating the land, trees, and caring for their orchards in order to give optimal growing conditions. Because of this expertise in growing these fruit trees, the taste of European EVOO is absolutely incredible! The different regions of Europe also produce different flavor profiles (sort of like how honey tastes like what plants it's next to). For instance, Spanish oil is typically a golden yellow with a fruity, nutty flavor while Italian olive oil is often dark green and has a grassy flavor. Greek olive is also usually more green in color and packs a strong flavor, while French oil is typically lighter in color and has a mild flavor.These olives that are typically harvested during the months of late November and into December taste mild and buttery, while olives harvested too early (around late August) are typically bitter and pungent. In the recipe below, I used the EVOO brand Olitalia, but any European Extra Virgin Olive Oil will do. I really enjoyed being able to taste this Italian EVOO and cooking with it! I can't wait to make an herb dip to really get the most out of that delicious flavor it has.What do you get when you combine an eggplant with red kidney beans? Red Bean Hummus, of course! Just picture refried beans that are actually good for you! Here's how to make them:
Red Bean Hummus

This veggie-packed dip is perfect for colder weather days and makes for a healthy light meal when served with pita bread or on a salad.
- 3 Tbsp Extra Virgin Olive Oil
- 1 egg plant
- 15 oz can red kidney beans (rinsed and drained)
- 2 garlic cloves
- 1 tsp cumin powder
- 1/2 tsp smoked paprika
- juice of 1 small lemon
- salt and pepper to taste
- 1 tsp ground coriander
-
Heat the oven to 400°F. Place the eggplant on a baking tray and roast for 40 minutes until soft. Allow to cook and then remove the skin.
-
Place the roasted egg plant flesh with all the ingredients, except the extra virgin olive oil, into a food processor.
-
Pulse until smooth.
-
Slowly add in the extra virgin olive oil until it becomes a smooth dipping consistency.
-
Add salt and pepper to taste.
-
Spoon into a deep serving bowl and finish with a swirl of extra virgin olive oil.
Olitalia believes all great cooking revolves around great oil. Olitalia is the #1 brand most used by chefs in Italy and is now available for home cooking in the US. Look for Olitalia at Eataly locations. Go to Olitalia's website here to learn more and be sure to follow them on Instagram! If you'd like to see more recipes like this, follow me on Pinterest!

Peach, Honey & Mint Puff Pastry Tart

This post contains affiliate links.
Let the peach obsession begin! To be completely honest, my favorite way to eat a peach is just to bite straight into the thing. However, I know that lacks all imagination and people would probably rather be presented with an actual dessert at the end of a meal than a bowl of fruit. So here we go...My dad has two peach trees in his yard. This year was the first year that we (the humans) got to them before the worms and the squirrels did. So with an abundance of peaches coming in every day, I needed to start researching what I was going to do with all of these delicious things!The first recipe I came up with was this one. My friend Christine and I were just playing around with ingredients and I was like, "Hey, let's see what happens..." And that's how this delicious little puff pastry tart came about. The fresh, juicy peaches are drizzled with sweet honey and topped with fragrant mint - all aboard a puff pastry crust that just screams - BITE INTO ME!This is the perfect last minute, throw together kind of dessert that you need in your life!
Peach, Honey & Mint Puff Pastry Tart

The fresh, juicy peaches are drizzled with sweet honey and topped with fragrant mint - all aboard a puff pastry crust that just screams - BITE INTO ME!
- 1 sheet puff pastry dough, thawed
- 3 peaches, sliced thin
- honey
- mint
-
Preheat oven to 375 degrees. Line a baking sheet with parchment paper. Place the puff pastry flat on a cookie sheet.
-
Arrange the sliced peaches on the puff pastry however you like. I love clean lines, so rows work great for me.

-
Drizzle the honey generously over the top of the peaches. Place the cookie sheet in the oven and bake for 30-35 minutes or until the pastry dough is fluffy and golden brown.

-
Remove from the oven and let cool for 15 minutes. Once cooled, drizzle again with honey and sprinkle the mint across the top of the tart. Cut into 9 square pieces and enjoy! (feel free to lick your fingers)


Products Used:
If you'd like to see more recipes like this, follow me on Facebook!