Blog
Martha Gene | Houston's Own Hat Bar

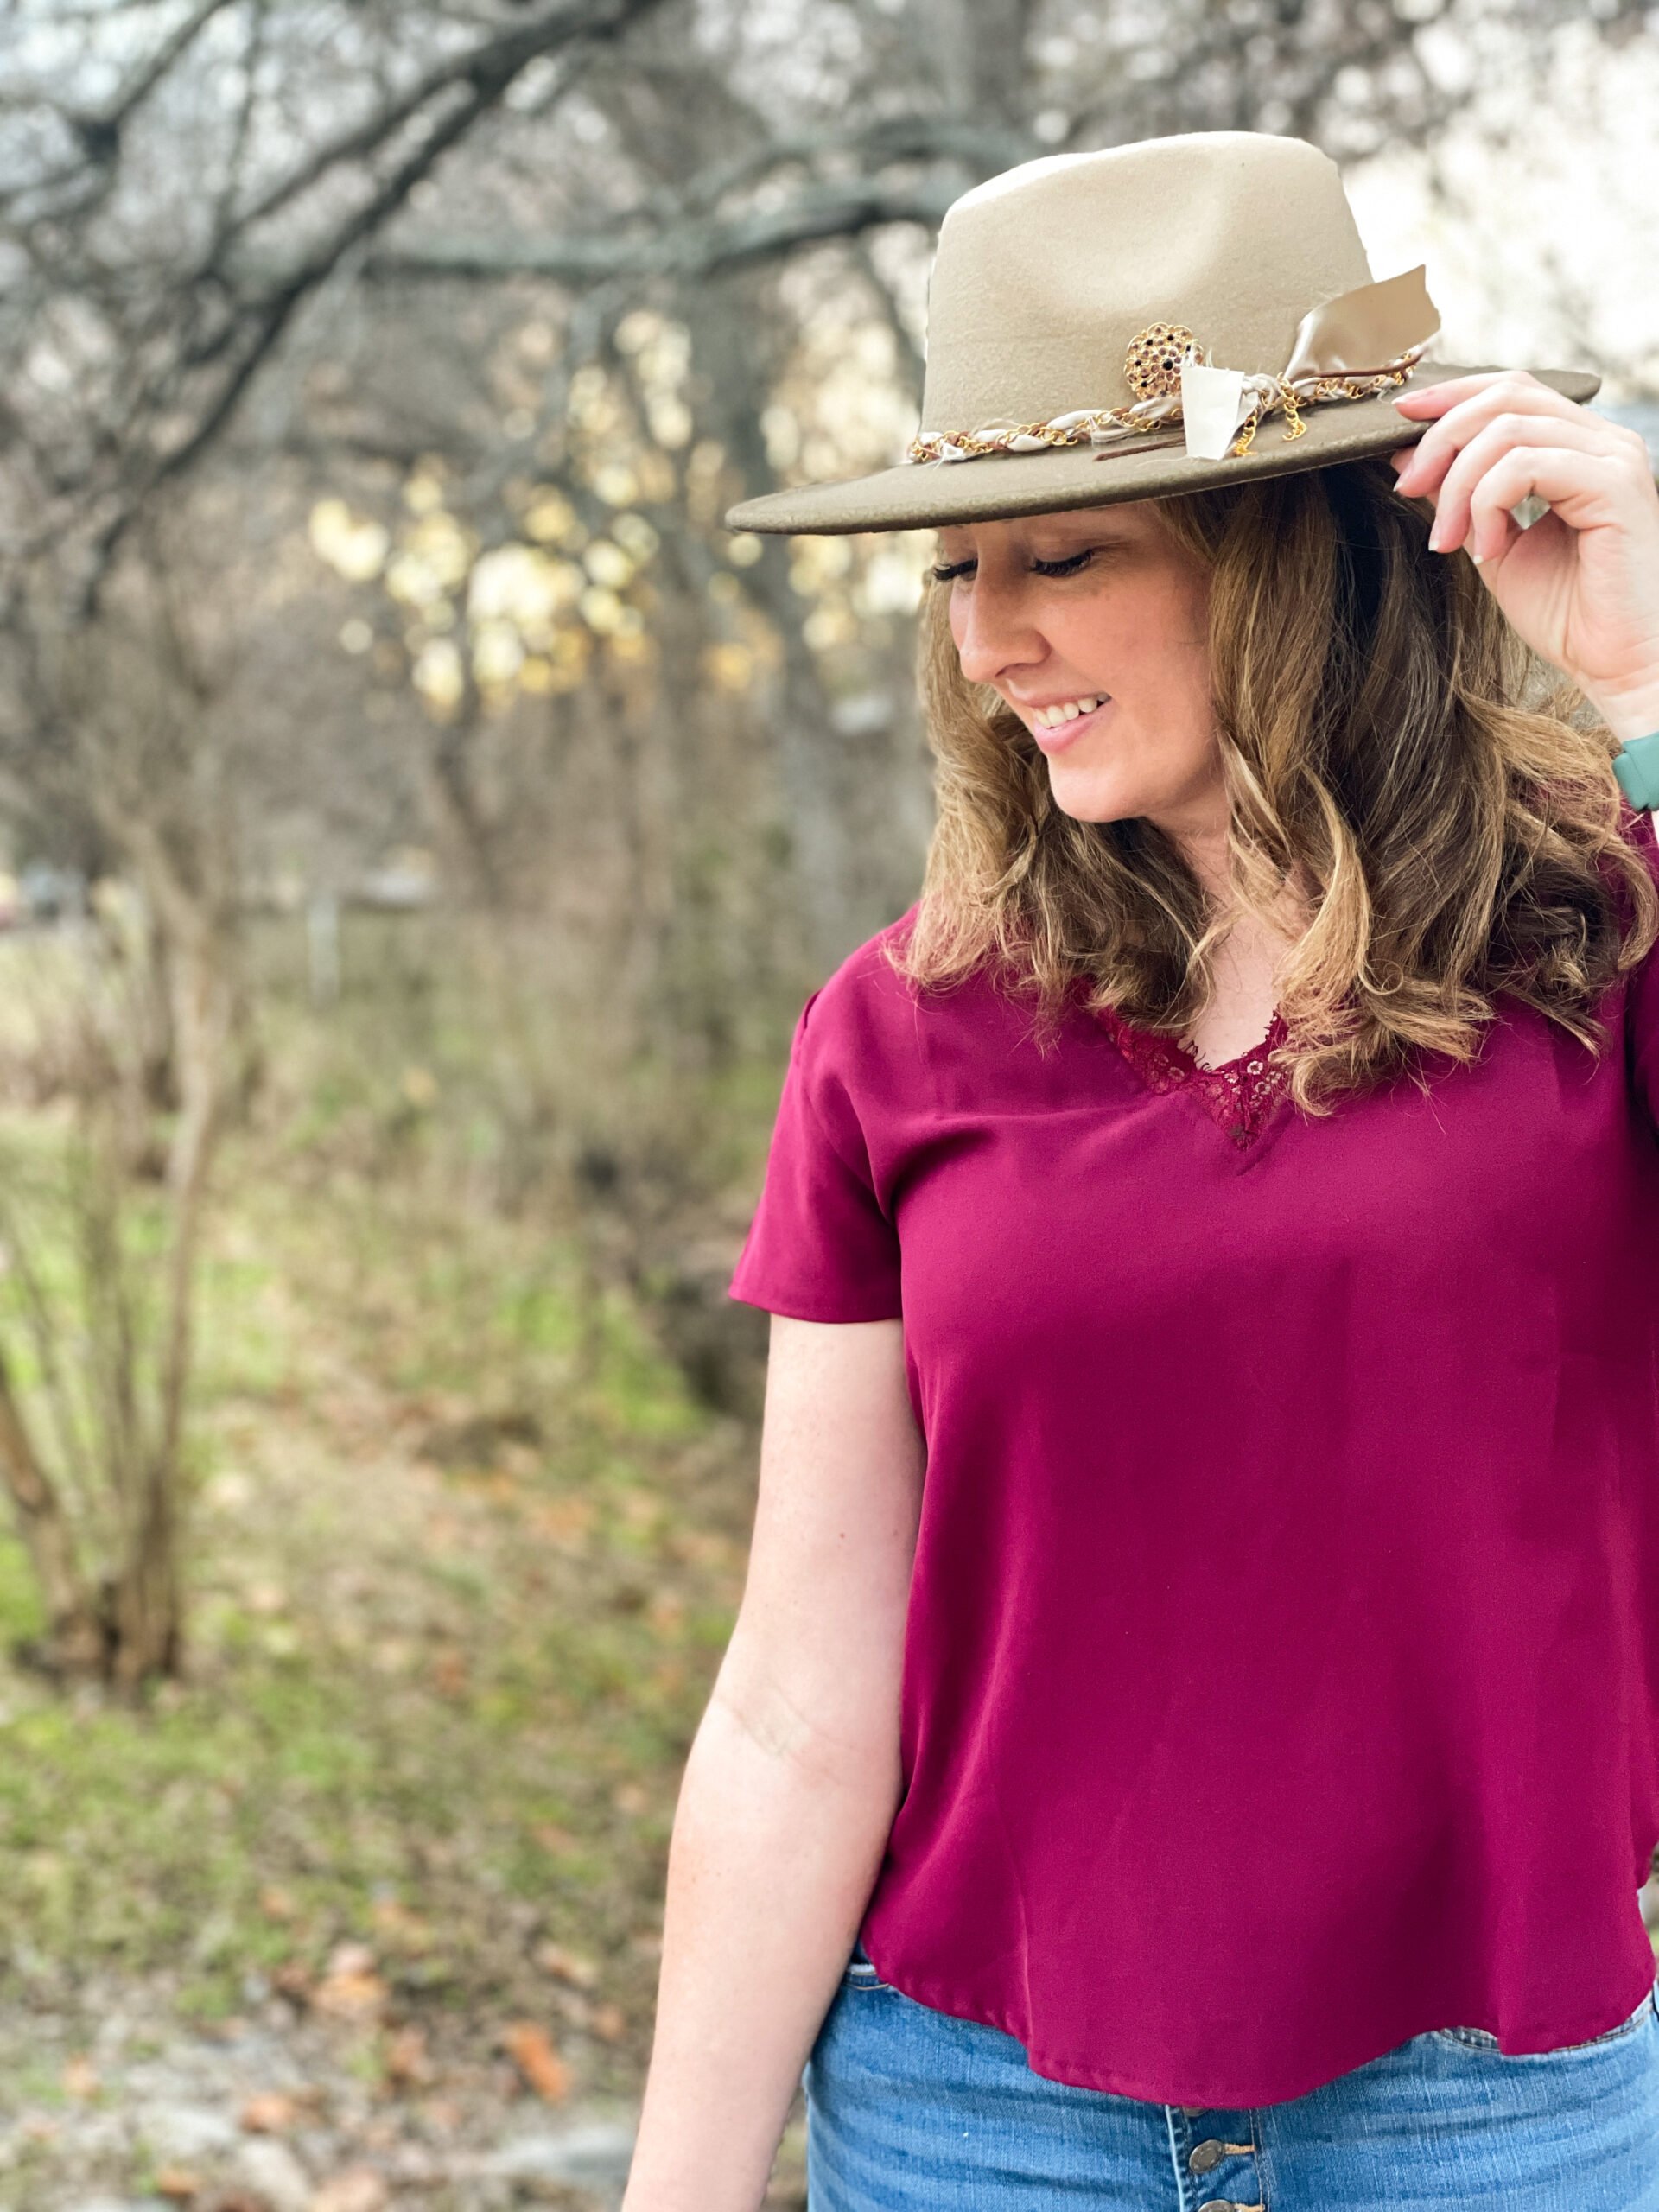
In Old Town Spring, just north of Houston Texas, you’ll find the cutest little boutique – Martha Gene. This little shop is right off the main street and has all you could ever want in modern western wear, boho classics, and feminine fabulousness.This adorable boutique is named after the owner’s grandparents – Martha and Gene. And you can see photos of them behind the register. But the main attraction we went for was the hat bar. You’ll need to make a reservation online before you go to hold your spot. It’s $20 and that covers the cost of the hat stylist helping you put your hat together.When we arrived, we met Brittany – the fabulous hat artist that was to help us design our hats. She showed us all of the hats to choose from and accessories and options that were available to us. First up, picking a hat. They have hats ranging in price from $30 to over $100, so you can pick the color and price point that best suits your needs. You can also bring your own hat with you if you have one you already own or picked out somewhere else.
Next up, the accessories. Armed with a little basket, you’re able to look over all of the ribbons, bands, feathers, and pins to create a style that’s uniquely yours. They even have some interesting options like wine corks, matchboxes, and playing cards – it was really fun playing with different ideas! Brittany was so amazing at helping us pick out items that went together and make decisions on what looked best. I’m super indecisive, so hearing her opinion on what went together best helped a lot. After all, she’s the pro at this.Not only can you attach items to the hat, but you can also burn it as well through distressing, branding, and Brittany can even freehand designs on your hat.In total, each hat we designed came out to about $80. But that price depends on the brand of hat you get and the amount of accessories you put on it.We had such a great time at Martha Gene and I highly recommend you go there to get a fully customized hat for yourself!Booking.comIf you enjoyed this post, be sure to SUBSCRIBE to my YouTube channel to see more fun local ideas like this!
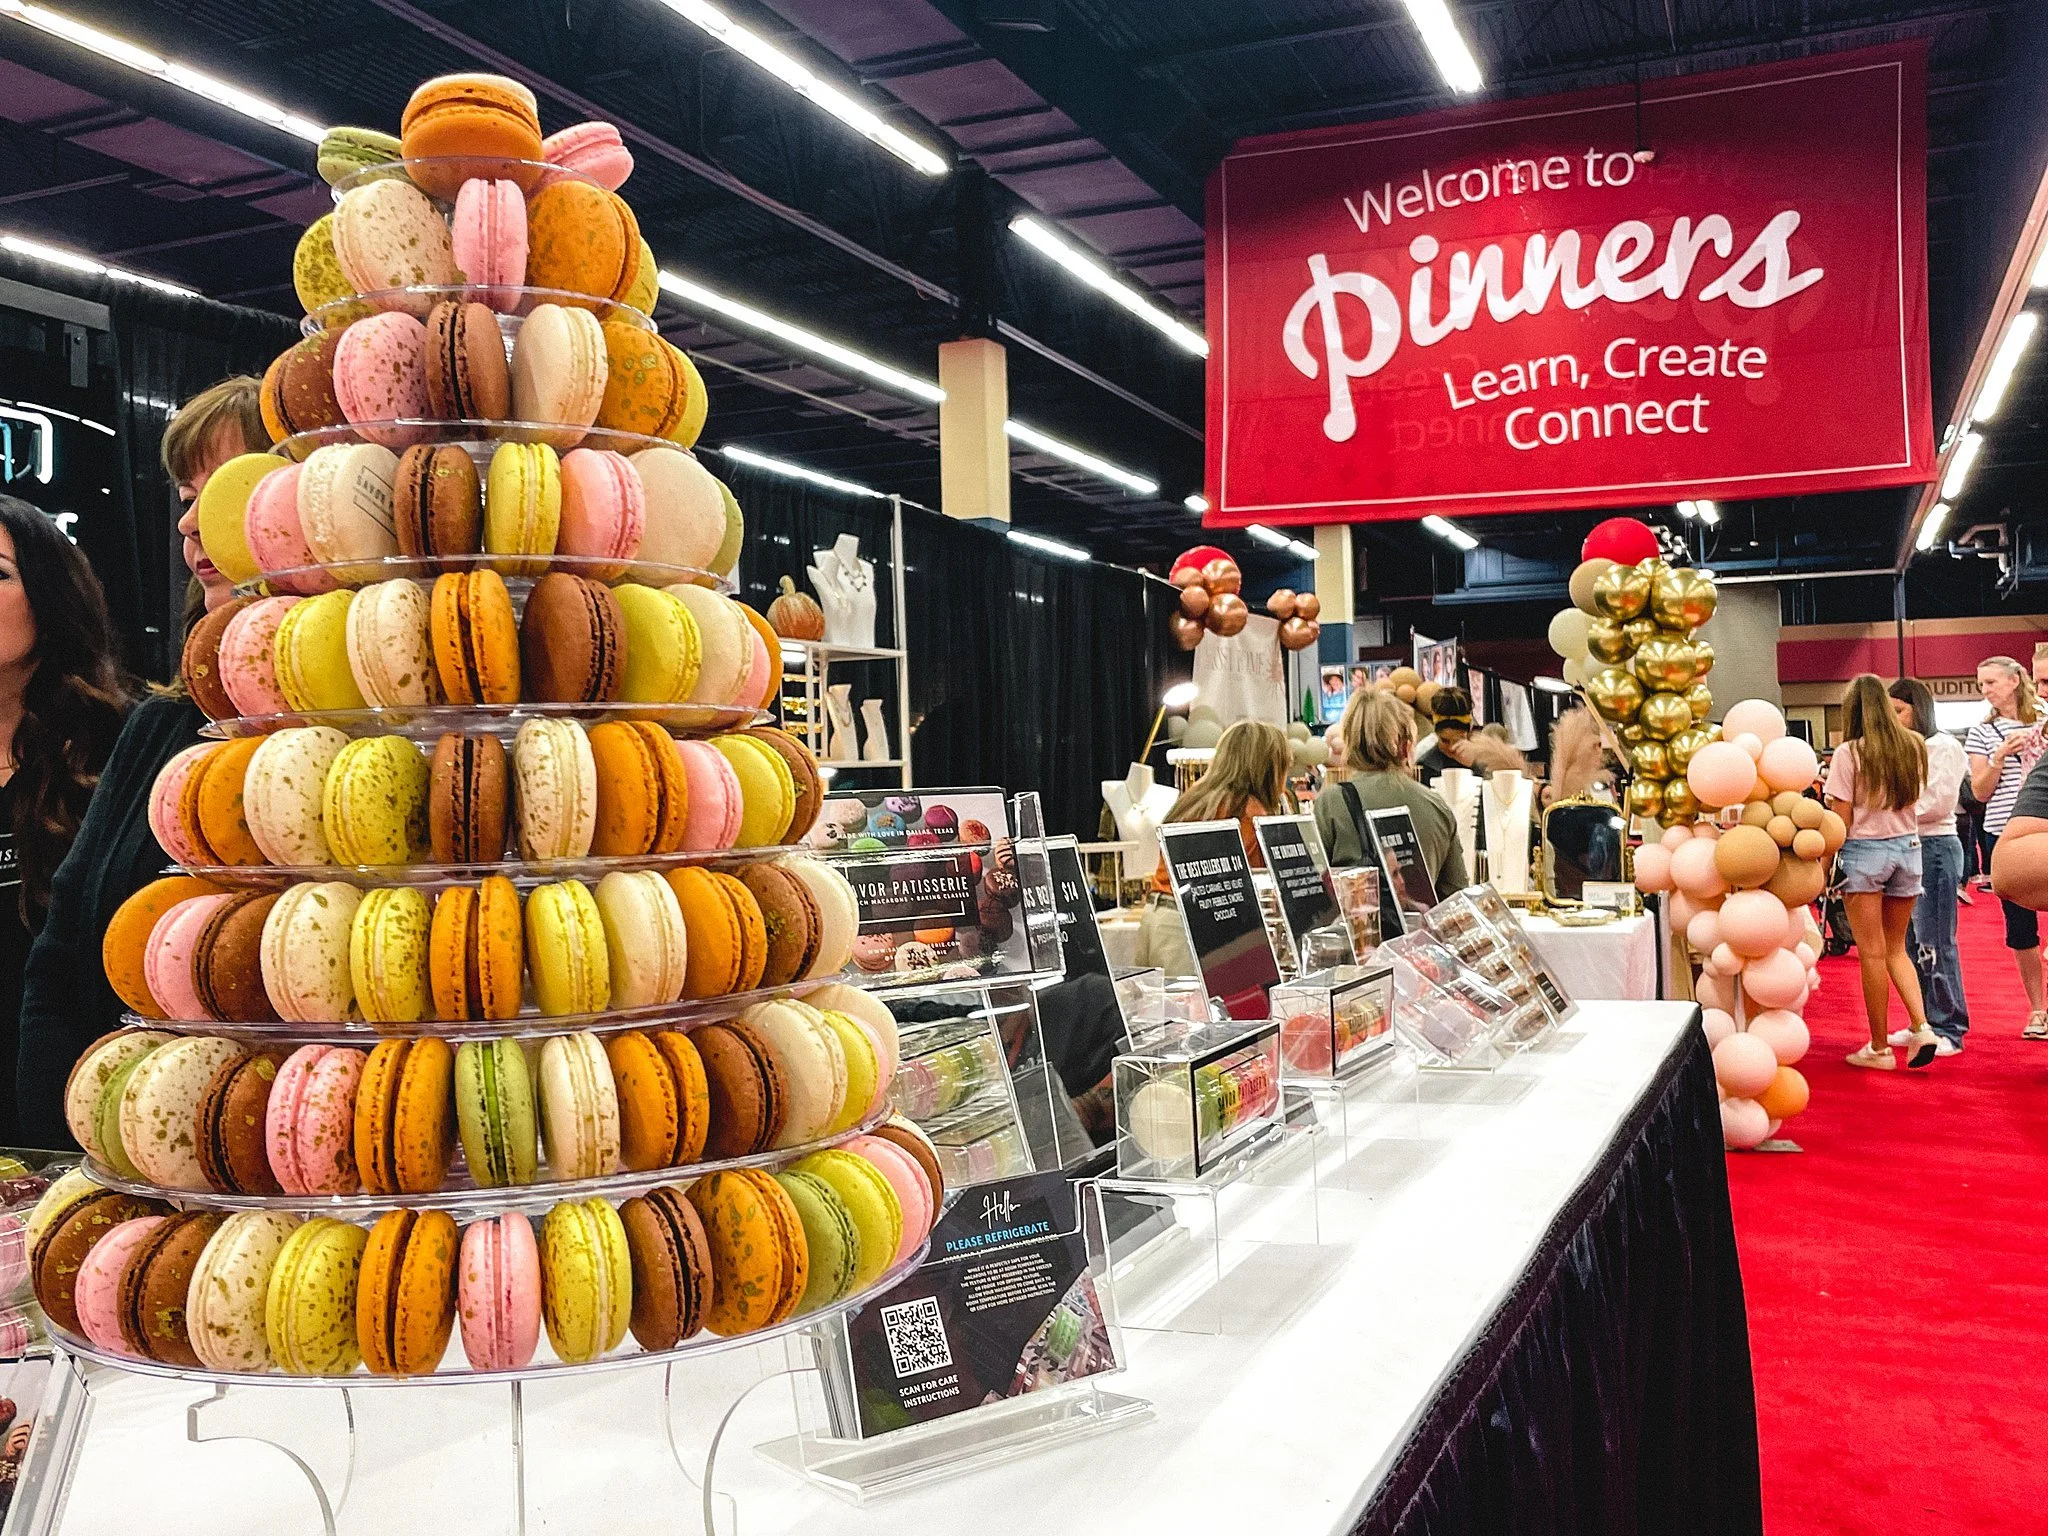
5 Things You Should Know About Before Attending Your First Pinners Conference

The Pinners Conference is a two-day long crafting, cooking, and organizing extravaganza! Basically, if it’s something you’d “pin” on Pinterest, then they’ll have something closely related to it there. There’s classes and shopping all day long both days and you are in for a real treat when you go.Before I get into what you need to know, I just wanted to say that I loved that this conference was not featuring a ton of big businesses. Yes, it had major businesses like Home Depot as sponsors, but for the most part, almost all of the presenters were small business owners who just love what they do. That passion shines through in the things they make and in the excitement during class time.
Now let’s get into it. Here’s what you need to know if this is your first time at a Pinner’s Conference.
-
Get your accommodations as early as possible.
We decided to go to the conference about a month before, so even then we had a difficult time finding anything close that wasn’t crazy expensive. We ended up finding a hotel about 20 minutes away that had free breakfast though, so I call that a win! I’m a sucker for free breakfast.Map out the location of the conference and see what’s nearby. The conference-sponsored hotels aren’t necessarily always the best, so do a little research on your own to see what works for you.Booking.com
-
Make a plan
The conference itself is two very full days long. You can choose one day or both and there really is no right answer – just whichever works best for you. If I was to pick one day only, I’d choose Friday. It was so much less packed in the expo area and the classes were easier to get into.However, if you’re looking for deals at the expo, the booths tended to have major sales on Saturday since they wanted to get rid of their product and not take it back home with them. You’ll also want to plan ahead for your classes. The classes are about an hour long and they are back-to-back throughout the day. You can register for as many classes as you like. This reserves your seat in the class. It’s free to register for the classes. The cost comes when it’s time to buy the material kit for each class.If you know you want to do certain classes, I would prepay for those material kits (but you also have the option to purchase them right before the class starts). We registered for one class and didn’t end up getting to take it because they ran out of materials.Also, the system will allow you to register for classes the week of the event but will NOT let you pre-purchase the material kits. If you want to make sure to get a kit the day of the class, get to the entrance line for that class about 15 minutes before it starts.
-
Be prepared for creativity overload
I love a good craft project. I love trying new things. So when I saw glass etching and chalk painting and macrame (all activities I have never done before), I was like “I need all of these!”. But in reality, I did not.In fact, we found that less is more at this conference. You don’t want sign up for too many classes. We found that 3 classes each day was our max. Any more than that and we were just going through the motions and not enjoying the process.Also, I feel the need to tell you to take your time. There is no rush. There is a lot to see. In fact, we spread the expo into two days. We did our 3 classes and saw one half of the expo booths on day one and then the other half on day two. It made it so much more manageable and we actually stopped and looked at things instead of just speeding past it all just for the sake of seeing it.Take your time. Relax. Stop and do a make and take.
-
Have a Budget In Mind
It is so easy to want to do and buy all the things. Trust me. If you’re a creative person like I am and want to try your hand at everything, it can be very tempting to sign up for more classes than I need and want to do tons of make and takes (I’ll explain more about those later).So before you leave home, decide what classes you want to do. Those classes range from free (like the organizing one I took) to I think the most expensive I saw was $35. Have that budget set for classes and decide what you’re comfortable with spending.Then decide on what you are okay with spending at the expo. The expo is basically a collection of food booths selling things like sauces, mixes, macarons, cookies, fudge, etc. And equally mixed in is home décor, clothing, hair products, and other boutiques. There are so many cute things and neat products that will be calling your name. I recommend bringing cash if you want to stay on budget. You can also look for the deals. I loved the “make and takes” these were tables set up the entire length of the expo center that had a different mini project at each table. These mini projects were things like make your own leather earrings, painted signs, terrariums, embroidery, etc. You work at your own pace and with little help from anyone, but the projects were all $5 or $10, so they were super cost effective.Most of them were mini versions of the hour long classes, so if you couldn’t get into a class, you could still try the project on a smaller scale.
-
Bring a Friend!
Could have I went by myself and enjoyed it? Absolutely. I saw many women doing that and having a great time crafting and getting to know other like-minded people. But having my best friend go with me was a huge plus. Everything is better when you get to share it with someone else who loves to get crafty as much as you do.And you don’t have to do all of the same classes! We did a few classes together and then some apart and it was neat because we were able to show each other out projects and talk about what we learned when we got back together. Overall, if you’re going to the Pinner’s Conference, you’re going to have an amazing time! They do an incredible job of setting everything up and it is very well organized. If you’re into crafting, this is the conference for you!
More Craft Projects You'll Love
How to Score Craft Store DealsDIY Embroidered Christmas Holiday Gift TagsMake Your Own Bath Bombs If you enjoyed this, be sure to SUBSCRIBE to my Youtube Channel!

How to Decorate Open Shelving in Your Home
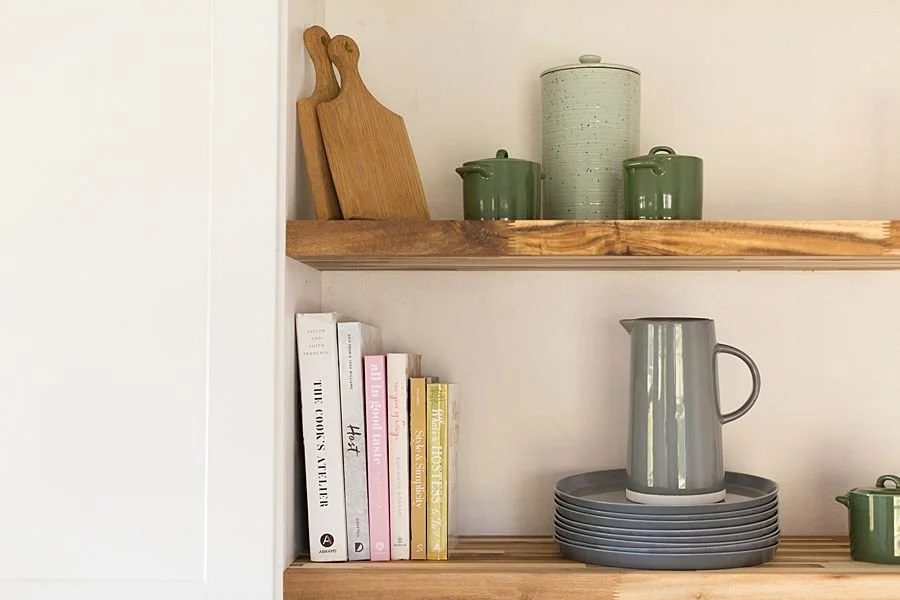
I am always in awe when I walk into someone's home and see that their bookshelves aren't messy or crammed with books like mine are. Instead, they've got books, a few trinkets, and other odds and ends all strategically placed and they're absolutely gorgeous. I do not have those skills.So since my own shelves need a little help, I decided to enlist my friend Lauren in helping us all learn about how to making those open shelves in our homes beautiful and functional.Watch the video below about how we pulled it off or skip down below to see her tips for styling your own shelves.
What are your 5 top five shelving styling tips?
- Shop your current collection - let's learn to display the pieces we have in our homes whether they are vintage or even souvenirs.
- Color vs neutral - decide what your style is and stick with 3 colors within that genre. There is nothing wrong with a two tone neutral base and pop of color. Or two vibrant colors and a neutral to connect the two.
- Texture and layers add visual interest so add in different elements to make it entertaining.
- Bring in life - plants or flowers are a must when creating in a space.
- Spacing - Don't clutter one shelf or countertop. Style a bit and take a step back to look at the bigger picture, then repeat until it FEELS right.

Where do people usually go wrong with styling bar carts, shelves, etc?
Clutter, clutter, clutter. Did I forget to mention clutter? Typically we want to showcase everything but everything doesn't go together. My suggestion is to appease your visual want of change, exchange out certain pieces for the season. Moving into spring/summer...opt for glass or white serve/dishware. Fall/winter? Think about mixed metals and woods. Each piece of your collection will have it's moment to shine in due time. I just want to say a huge THANK YOU to Lauren from Toast From the Host for showing us how to decorate open shelving in our homes. If you'd like to see more home tips like this, SUBSCRIBE to my YouTube Channel!
How to Make a Car Out of a Cardboard Box

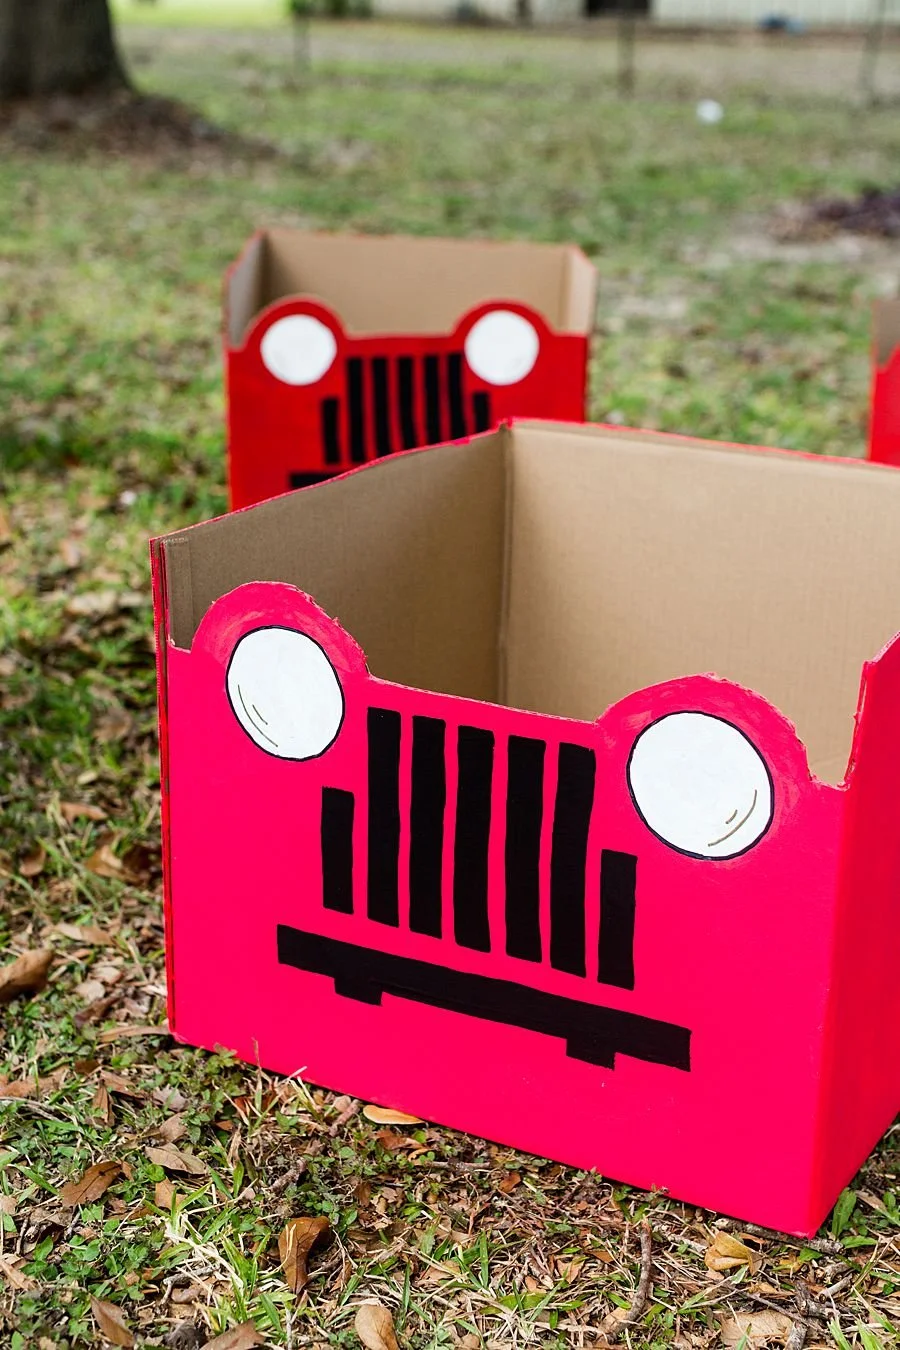
Whether it’s a Jurassic park viewing party or a drive in movie in the backyard, these cute little cardboard jeeps are perfect to keep the littles entertained.Here’s how to make a few for your next party.
How to Make a Car Out of a Cardboard Box

- Pencil
- Box Knife / Exacto Knife
- Paint
- Foam brushes
- Black Paint Pen
- Gold Paint Pen
- Paper plates
- Start with a 20x20x15 cardboard box. Using something circular (I used a roll of ducktape, trace two circles in the top left and top right sides of the box. Make sure the circles are about 2 inches away from the edges.
- Next, draw a straight line from one circle to the other with a one inch gap from the end of the line to where each circle is. Then, continue your line around the top edge of the circle (staying about 1 inch parallel from the circle) and then continuing the straight line on the other side.
- After this, you’re going to draw the grill of the jeep. You’ll draw 5 (one inch wide) lines about 6 inches straight down the middle of the box. There will also be two lines of the same width about half as long.
- The bumper is next. Draw a 1 inch thick line almost all the way across the box (under the grill) and the little rectangular supporting brackets as well. It’s okay of this part isn’t perfect, you’re going to paint over it anyway.
- Cut out the top edge of the car, along with the other box flaps on that side.
- Next, choose your main acrylic paint color, and paint everywhere on the box (all sides) except for where the circles are.
- Now, using a white acrylic paint, paint inside the circles.
- Next, using a black paint marker, draw the outline of the white circles – creating a clean line between the white and your base color.
- Then, use a gold or silver metallic paint pen and draw 2 curved lines (one longer and one shorter) inside the white area. This is what gives the headlights some character and makes them look like they’ve got some depth.
- Using a 1 inch wide foam roller, you’re going to paint in your grill now. Each grill lines should be about 1 inch wide, so it’s just a simple downward stroke with the foam brush to make it a nice looking line. Paint in the bumper as well.
- Next up, time for the tail lights. Using some of that cardboard you trimmed off earlier, cut a rectanglular piece about 2 inches by 4 inches in size. Cut the tips of each point so they’re more rounded instead of having a hard edge on them.
- These rectangular pieces are going to help you make your taillights. On the opposite side of the box car from the headlights and grill is the back of your car. Line your headlight template (the 2x4 piece of cardboard) a few inches from the bottom and each side and trace the outline using your black paint marker.
- If the car isn’t red, you’ll need to also paint your tail lights red at this point as well.
- Next, you’ll be making the spare tire for the back. This is a great step for kiddos because they can’t mess it up. Just give them a foam brush, black acrylic paint, and tell them to paint all over the front of that plate. Using ducktape, glue, or whatever you have on hand, attach the spare tire to the back of the jeep.
If you wanted to do even more, you could add a personalized license plate on the back, doors, etc. Make it your own!
And that’s it! The kids at our party had an absolute blast and loved having their own little cars!
Items Needed:
 If you enjoyed this tutorial, be sure to SUBSCRIBE to my YouTube channel to see more!
Creating an Affirmation Jar | 101 Positive Thoughts, Mantras, and Affirmations to Start Your Day

The world is in chaos.I guess it always has been in one way or another, but it sure feels like "the sky is falling" from where I'm sitting.Today as I'm writing this from a local coffee shop and feeling oh so thankful to be able to go inside the building, order a drink, and sit at a table while I work, I can't help but feel the weight of the world on my shoulders. There is rioting, looting, gang violence, sex-trafficking, and just outright ugliness everywhere I turn. It's disheartening to say the least.So here I sit. Feeling this weight. Absorbing the negative energy I feel all around me. And so thankful at the same time. I am lucky enough to work for myself and still have the ability to work. No one in my family, nor I have gotten sick. We are healthy, happy, and moving forward.But some days are harder than others. Some days I let the harshness around me influence my mental health. And some days, it's just too much to handle. On these such days, I look for the good. I look for the people helping one another and being kind to one another. I seek out the positive. And that starts form within.
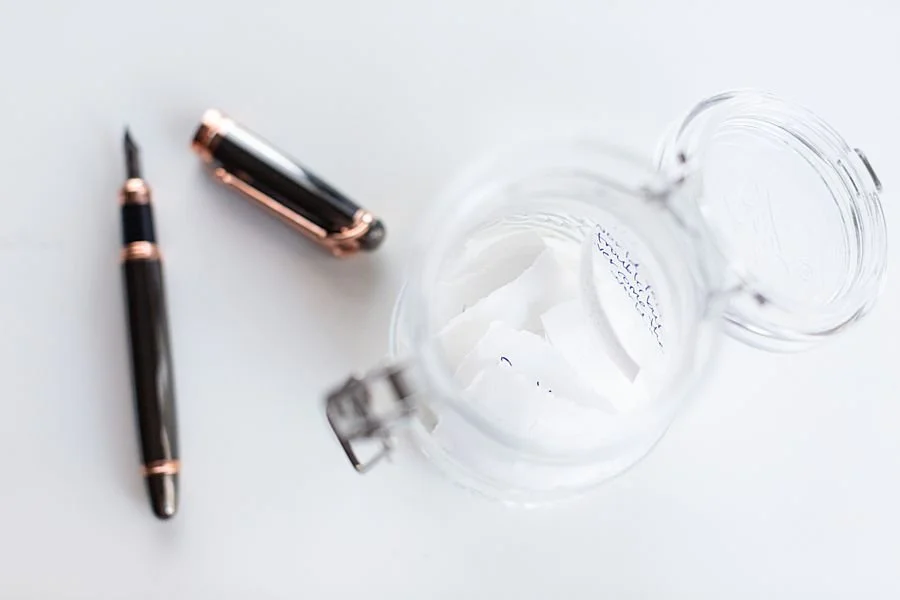
I've recently started an affirmation jar. This little jar is full of positive messages, helpful mantras, motivational bible verses, and daily reminders of the positive impact I can have on the world if I just focus on what I can do instead of what I can't do.So if you're like me and need some daily reminders of the good stuff we have in life and positive messages we should have flooding our neuro-pathways, here's a list of 101 affirmations. I've written each of these on a little piece of paper and put them in a jar. Every morning. I pull out the positive message for the day. It's a great way to keep me grounded and not let the negativity take over. I hope it helps you as well!
-
-
- "For I know the plans I have for you," declares the LORD, "plans to prosper you and not to harm you, plans to give you hope and a future." -Jeremiah 29:11
- I’m courageous and stand up for myself.
- I will succeed today.
- I deserve to have joy in my life.
- I’m worthy of love.
- "And we know that in all things God works for the good of those who love him, who have been called according to his purpose." -Romans 8:28
- I approve of myself and love myself deeply.
- My body is healthy, and I’m grateful.
- I’m more at ease every day.
- I’m calm, happy, and content.
- "The steadfast love of the LORD never ceases; his mercies never come to an end; they are new every morning; great is your faithfulness." - Lamentations 3:22-23
- My life is a gift and I appreciate everything I have.
- I’ll surround myself with positive people who will help bring out the best in me.
- I don’t need someone else to feel happiness.
- I’m allowed to take the time to heal.
- My imperfections make me unique.
- I’m allowed to make mistakes; they don’t make up my whole story.
- I choose not to criticize myself or others around me.
- My potential to succeed is limitless.
- Money comes to me easily and effortlessly.
- Difficult times are part of my journey and allow me to appreciate the good.
- I forgive those who have hurt me.
- I’m in charge of my life and no one will dictate my path besides me.
- "So we do not lose heart. Though our outer self is wasting away, our inner self is being renewed day by day. For this light momentary affliction is preparing for us an eternal weight of glory beyond all comparison, as we look not to the things that are seen but to the things that are unseen." 2 Corinthians 4:16-18
- I constantly attract opportunities that create more money.
- I’m doing my best and that is enough.
- I have the power to create change.
- I know exactly what to do to achieve success.
- I choose to be proud of myself and the things I choose to do.
- I will not compare myself to strangers on the Internet.
- I am enough.
- I let go of all that no longer serves me.
- "Be strong and courageous. Do not be afraid or terrified because of them, or the LORD your God goes with you; he will never leave you nor forsake you." -Deuteronomy 31:6
- I love myself fully, including the way I look.
- My life becomes richer as I get older.
- I can absolutely do anything I put my mind to.
- I’m worthy of respect and acceptance.
- My contributions to the world are valuable.
- I am worthy of making more money.
- My needs and wants are important.
- I make a significant difference to the lives of people around me.
- I am blessed with an amazing family and friends.
- I attract money easily into my life.
- My life is full of amazing opportunities that are ready for me to step into.
- I’m free to create the life I desire.
- "For I am convinced that neither death nor life, neither angels nor demons, neither the present nor the future, nor any powers, neither height nor depth, nor anything else in all creation, will be able to separate us from the love of God that is in Christ Jesus our Lord." - Romans 8:38-39
- I’m open to new adventures in my life.
- I’m bold, beautiful, and brilliant.
- My body shape is perfect in the way it’s intended to be.
- When I allow my light to shine, I unconsciously give other people permission to do the same.

- "Our faith can move mountains." -Matthew 17:20
- I am open and receptive to all the wealth life offers me.
- I will not judge others.
- My actions create constant prosperity.
- I will embrace today and take a chance doing something that scares me.
- Money and spirituality can co-exist in harmony.
- I am full of positive loving energy.
- I welcome love and romance into my life.
- "The LORD is my light and my salvation; whom shall I fear? The LORD is the stronghold of my life; of whom shall I be afraid?" -Psalm 27:12
- I am in a loving and supportive relationship.
- No amount of guilt can change the past, and no amount of worrying can change the future.
- To make small steps toward big goals is progress.
- Negative thoughts only have the power I allow them.
- "Trust in the LORD with all your heart, and do not lean on your own understanding. In all your ways acknowledge him, and he will make straight your paths." -Proverbs 3:3-6
- I can choose to make my curses my blessings.
- I deserve love and I get it in abundance.
- I am loved, loving and lovable.
- I will accept that sometimes things must end.
- I am blessed with an incredible family and wonderful friends.
- I give out love and it is returned to me multiplied manyfold.
- I forgive myself and set myself free.
- "What, then, shall we say in response to these things? If God is for us, who can be against us?" -Romans 8:31
- I believe I can be all that I want to be.
- I am in the process of becoming the best version of myself.
- I have the freedom & power to create the life I desire.
- I will not compare myself to others.
- I choose to be kind to myself and love myself unconditionally.
- I am thankful I woke up this morning.
- My possibilities are endless.
- I will not do things for others that makes me unhappy.
- I am worthy of my dreams.
- I deserve to be healthy and feel good.
- "I can do all things through Christ who strengthens me." -Philippians 4:13
- I am full of energy and vitality and my mind is calm and peaceful.
- Every day I am getting healthier and stronger.
- I honor my body by trusting the signals that it sends me.
- I manifest perfect health by making smart choices.
- I am grateful to be alive. It is my joy and pleasure to live another wonderful day.
- Happiness is my birthright. I choose to be happy and I deserve to be happy.
- Being happy comes easy to me. Happiness is my second nature.
- "May the God of hope fill you with all joy and peace as you trust in him, so that you may overflow with hope by the power of the Holy Spirit." -Romans 15:13
- Good things are happening.
- I will not listen to the "haters".
- I am deeply fulfilled by what I do.
- I’m allowed to take up space.
- "Jesus looked at them and said, ‘With man it is impossible, but not with God. For all things are possible with God.'" -Mark 10:27
- My past is not a reflection of my future.
- I am smart enough to make my own decisions.
- I’m in control of how I react to others.
- I choose peace.
- "Fear not, for I am with you; be not dismayed, for I am your God; I will strengthen you, I will help you, I will uphold you with my righteous right hand." -Isaiah 41:10
If you'd like to see more uplifting and positive things to incorporate into your life, follow me on Facebook!
-

5 Tips for Easy Spring Cleaning

This post contains affiliate links. All photos and opinions are mine and should not be used without written permission.
I don't know about you, but all of this time I'm spending at home is making me look around my house and realize I need to purge. Badly. I've got a few unorganized spaces and I know that when I'm organized, I'm more focused and productive. So in case you need some help in this department, I'm going to show you what I do in order to get inspired and get tidy. This post is adapted from a video I created for Walmart's Grocery Pickup Magazine.
Focus on one space at a time
Rome wasn’t built in a day and cleaning up your house isn’t going to happen that fast either! Start with one area that bothers you most and take it from there. For me, it’s my desk. Let’s get this thing cleaned up!
Get Everything Out.
Take everything out of the area you’re working on. Clean out every drawer. Open the doors and pull out all of those loose papers.
Make the Hard Decisions
Once you have everything out of your space, separate all of the items in 3 categories – Keep, Donate/Sell, Trash. This is definitely the hard part because you simply cannot keep everything! You’ve got to purge some stuff, Mama! Use a Great Value trash bag to bag it all up.
Clean everything before you put it back.
Dust, wipe down, and disinfect it all so that you know that everything that is going back into that space is going to be clean and safe for your family. One thing I do is I keep all of my general cleaning supplies in one easy to carry tote. I love using my magic eraser to get those hard to clean marks off of walls, tables, and floors. I seriously don’t know how they work but they’re amazing! I also use this time to fix anything that may be broken or missing pieces.
Create a space for everything you’re keeping
Before you just start shoving everything back into the space, have a plan in mind! Make sure you have a specific place for everything, because if everything has its own place, you’re sure to stay organized.
I feel so much better now that I have a clean desk and area to work in!Happy Spring Cleaning![activecampaign form=1]
Forget Brunch with the Girls, Try Coffee and Cupcakes for Valentine's Day Instead!

I'm just going to say it. Valentine's Day is not my favorite holiday. I've never really cared to give my classmates fold-over valentine's that have cutesie messages in them and are sealed with a heart sticker. My husband and I hardly ever celebrate it. For us, it's just another day because we do little things to show one another that we love each other every single day. That being said, I've shown in the past my Valentine's Date Night Checklist, How to Create the Ultimate Valentine's Day Breakfast in Bed, and even given 10 Ideas on What to Get Hubby for Valentine's Day. But when it comes to "Galentine's Day", that's a whole other thing entirely. There's just something about being around your girlfriends and crafting, eating, and chatting that is just so fun! Maybe it's because we all get a kick out of the hearts and pink and red decor, but it's always a good time - no matter what we do.This year, we decided to make things easy on ourselves by skipping the brunch and having a "Coffee and Cupcakes" girl's morning instead. We had so much fun and I'm going to show you everything you need to pull of this easy-peasy event!
Decor
I am a firm believer in using a lot of items from your home that you have already and then just adding a few pieces that will make the theme or holiday pop. For this Valentine's Day setup, I chose to go with a Modern Farmhouse Valentine's Day celebration that was just the right amount of pink, red, hearts, and love to set the tone. A lot of the items I got from Jane.com, but since that site is seasonal, I thought I'd show you other options to get similar items if you liked them and wanted them fro yourself.
Mirror
Full disclosure...I grabbed this white farmhouse mirror right off of my mantel. I like it on the table because it added some height to the overall look and it draws your eye up. If you're looking for one like it, I found one like it here.
Buffalo Plaid Table Runner
This black and white checkered table runner is so versatile! I keep it on my table year round and change out the decor around it. Super simple!
Felt Leaves Garland
You know I had to add a little green into the mix, so this fake leaf garland was perfect! I found a similar one here that would look great as well!
Farmhouse Pitcher
I found this adorable green farmhouse pitcher at Dirt Cheap and I put some fake (but good fake) flowers in it. I found a similar looking white farmhouse pitcher here.
Vintage Metal Mug Holder
This mug holder might be my favorite find on the table. It's such a great use of space and easy for people of all ages to grab a cup to use for their coffee or hot chocolate. It looks perfect in a coffee bar in your kitchen.
Hand Towel & Towel Ladder
I am so in love with this little kitchen towel ladder! And then I found the most perfect little Valentine's Day kitchen towel and of course I had to incorporate it in to the look as well.
Wood Chalkboard Coffee Sign
Perfect Peace Designs made this for me and I just love it! It ties the whole table together and I'm so impressed by her creativity!
Pom Pom & Tassel Wall Hanging
My friend Lauren at Cotton & Sawdust is so talented! She makes the coolest stuff and how gorgeous is this wall hanging made out of pom poms and tassels? She also makes some beautiful macrame pieces as well!
Food & Fun
First of all, music is a must! Anything from "Girl's Just Want to Have Fun" to Spice Girls is perfect!
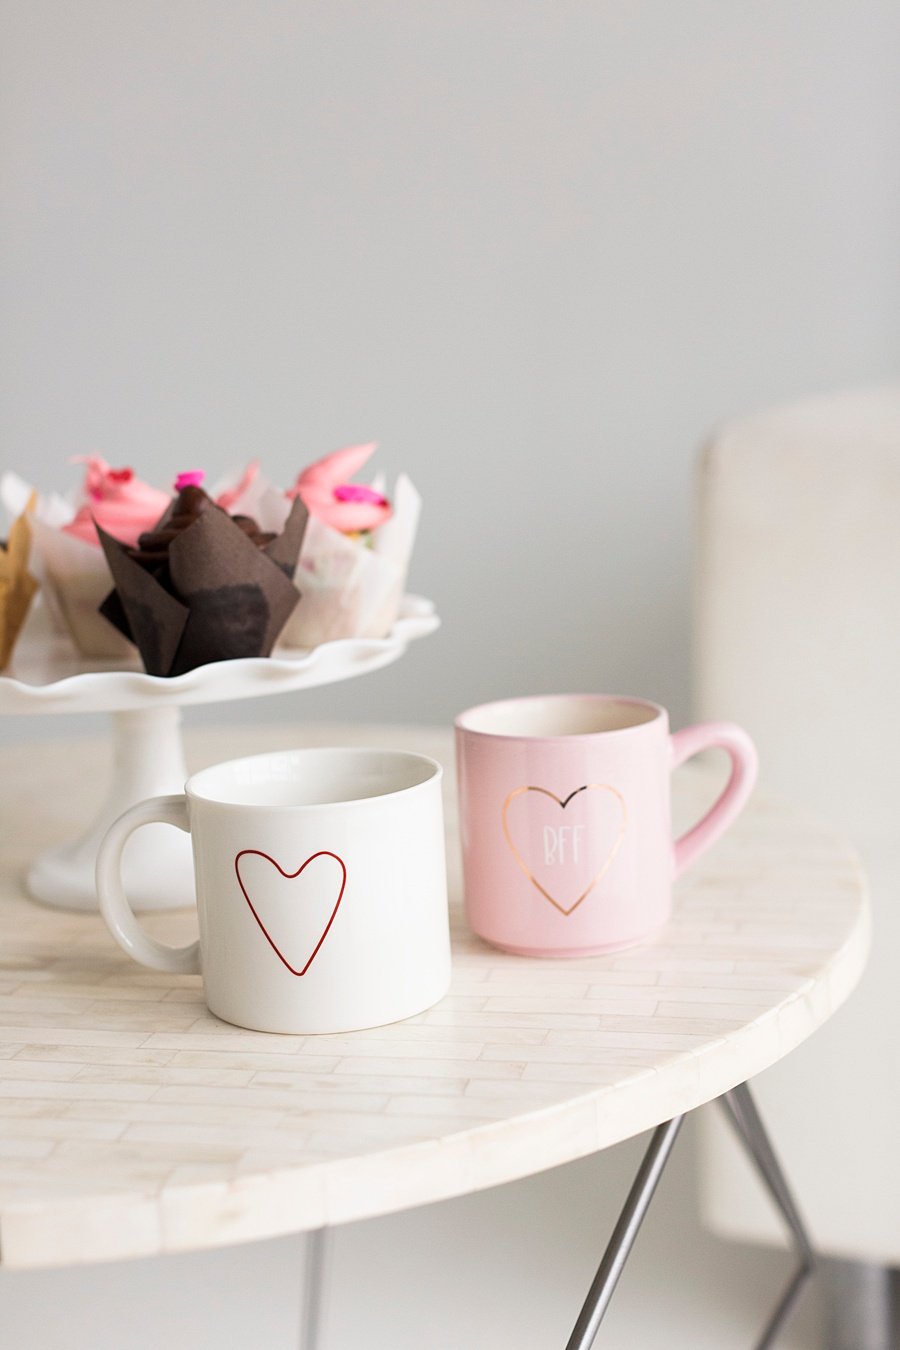
Mugs
After we had the right tunes playing, we got our coffee on! I found the most adorable Valentine's Day mugs, so everyone had a different one!
Cupcakes
First of all, these cupcakes look WAY fancier than they are. Here's my little secret...these are made from a regular old box mix. The only difference is that I got these tulips parchment paper liners and filled the cupcake liners with double the batter (so instead of the box mix making 24 cupcakes, it only makes 12 over-sized cupcakes instead). The best thing about these is that they're made out of parchment paper, so your cupcake goodness won't all come off on the wrapper. You can get red paper, pink paper, or this craft paper 3 color set that I used. They also have other colors here for any occasion (or just because) you like!
Up to 65% off New Deals added every day at Jane.com! Shop today!
Decorating the Cupcakes
Could have I just iced them myself? Yes. But it's way more fun to do it with your friends...because it always turns into a competition of who's looks best. Here's a tip for how to make it as mess-free and easy to ice as possible. I use store-bought icing and put it into tipless piping bags. I just apply light pressure, swirl the icing around the top, and voila! A pretty little cupcake! Just don't forget the oversized heart sprinkle. If you'd like to see more tips like this, follow me on Facebook!
Candy Cane Christmas Cake Roll

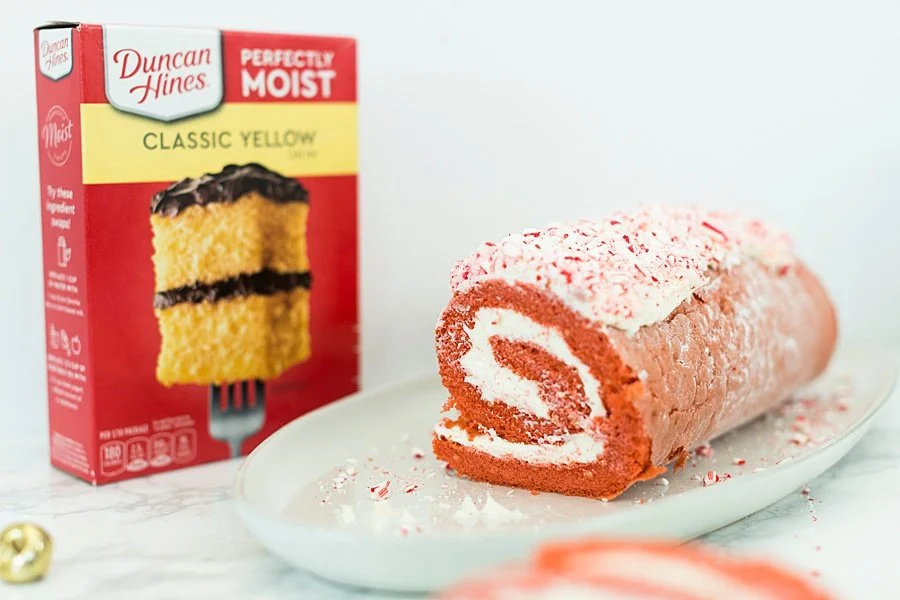
Whether you're attending a Christmas party at someone's house or hosting a holiday get together in your own home, this Christmas cake roll is sure to be a big hit! Here's why I like it:
- This recipe uses a box cake mix, so that means it automatically starts off easy
- Talk about cheap to make! You literally use leftover candy canes and budget-friendly ingredients to make this dessert and the finished product costs less than $5 total.
- It's a super festive dessert that looks great and looks like you worked really hard, but it's simple as long as you work quickly and effectively.
 So get out those cake mix boxes and let's start baking!
Candy Cane Christmas Cake Roll
Spongy cake is wrapped up with sweet icing and topped with leftover candy cane pieces. It's the perfect dessert to enjoy this holiday season!
- 6 eggs
- 1 red velvet boxed cake mix
- 1/2 cup water
- 1/4 cup vegetable oil
- 1/4 cup powdered sugar
- 2 containers whipped frosting ((16 oz containers))
- 1/2 cup candy canes (finely chopped)
-
Heat oven to 375°. Line the bottom of a jelly roll pan (size 15x10x1) with parchment paper. Spray the paper and sides of the pan with baking cooking spray (the kind with flour in it).
-
In a large bowl, beat the eggs for 6 minutes or until frothy. Add in the cake mix, water, and oil. (I used a butter cake mix, so I also added a red gel food coloring to make it appear red, but if you use a red velvet cake mix, you can skip this step). Mix the ingredients until well blended.
-
Pour 3 1/2 cups of batter into the pan and use a spatula to spread the batter to the sides of the pan. Set aside the remaining batter.
-
Bake for about 14 minutes (or until a toothpick will come out clean in the middle). Take a large (clean) kitchen towel and sprinkle the powdered sugar all over it. Once the cake is done, immediately turn the cake out onto the powdered sugar covered towel and peel off the parchment paper. Starting at the narrow end, roll the towel and cake into itself, creating a spiral. Cool the rolled-up cake on the counter for 10 minutes at room temperature and then place in the refrigerator for one hour to cool.
-
For the remainder of the batter, line a muffin tin with 6 baking cups and divide the batter between the cups. Bake at 375° for 15-18 minutes.
-
Unroll the cake carefully and remove the towel. Allow the end to remain slightly curled. Spread one full container and one half of another container of frosting over the surface of the cake. Re-roll the cake, wrap in plastic wrap, and refrigerate 30 minutes.
-
Remove the cake from the refrigerator. Spread half of the second container of icing across the top of the roll. Cover the icing with candy cane pieces. Slice and enjoy!
Products Used:


OREO Cookie Ball Thanksgiving Turkeys

This post contains affiliate links. All photos and opinions are mine and should not be sued without written permission.
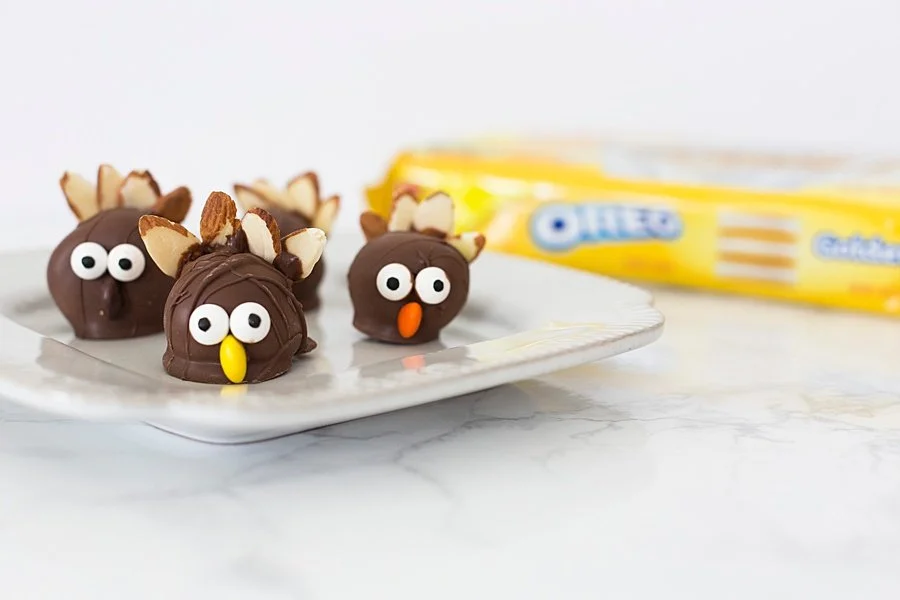
It's time to get our gobble on! Thanksgiving is only a week away and I'm stoked to get together with family and talk, laugh, and eat! These OREO turkey cookie balls are the cutest desserts you'll see on that Thanksgiving table of yours and everyone is sure to love them!
OREO Cookie Ball Thanksgiving Turkeys

Tasty OREO cookies are mixed with cream cheese, coated in chocolate, and decorated to look like cute little turkeys = perfect for your Thanksgiving table!
- 1 pkg (8 oz brick cream cheese, softened)
- 36 OREO Cookies (finely crushed)
- 16 oz dark chocolate melting chocolate (melted)
- 48 Candy eyes
- ¼ cup Peanut butter candy (halved)
- ¼ cup Almond slices
- Crush the OREO cookies until they’re a breadcrumb consistency.
- Mix the cream cheese and cookie crumbs until well blended. Using a 1 tablespoon scoop, scoop the portion the balls out and roll in your hands until smooth.
- Place on a parchment paper-lined cookie sheet and freeze for 1 hour.
- Dip the balls, one at a time, in the melted chocolate.

- Using the melted chocolate as the glue, attach the candy eyes, peanut butter candy, and almond slices to the cookie balls.
- Refrigerate 1 hour or until firm. Keep refrigerated.
Products Used:
If you'd like to see more recipes like this, follow me on Pinterest!
All You Need to Know to Host the Ultimate Magic Kingdom Themed Party
I received free products in order to host a #NowMoreThanEver Disney Playdate Party.
The photos and opinions expressed here are my own and should not be used without written permission. This post contains affiliate links.

What's in the Box?
If you haven't met me before, you'd think I was nuts....that is, when it comes to anything Disney. So when Walt Disney World reached out to me and asked me to host a playdate for their #NowMoreThanEver campaign, I jumped at it! Disney sent me and 80+ other mom bloggers world-wide a box just like this filled with party goodies and told us to have fun with it and make it our own.To say I was excited to get the box and see what was in it is an understatement. I watched the UPS tracking app like a hawk and on the day of delivery, I made sure I was home all day. And then it came. That glorious UPS man dropped off the large cardboard box affixed with a mickey sticker on top and the kids and I ripped into it like it was Christmas.Here's what I found in that box:
- Pinata,
- Pin the nose on the mickey
- Popped Passion Popcorn Cake
- Swirl decorations
- Tablecloth
- Mickey plates
- Mickey cups
- Balloons
- Mickey napkins
- Mickey masks
- Silver Mickey Ears (yes, I put them on as soon as I saw them in the box)
- Princess dress (courtesy of Jakks Pacific)
- Rapunzel doll (courtesy of Jakks Pacific)
- Mickey Pillow Pet (from Pillow Pets Disney)
- Mickey stickers
- Printable Fab Fortune Tellers
- Michael Angelo’s Baked Ziti and Meatballs
- Printable Matching Game.
 So that was a great start, but I felt like I needed to come up with a cohesive theme to tie everything together. One thought I couldn't get out of my head was the magic of Walt Disney World and how I wanted that element to be present at the party. I wanted people to walk in and be wowed from the moment they stepped in the door.When visiting Walt Disney World, that moment for me is when I'm walking down Main Street USA and I see Cinderella's Castle right there in front of me in all it's magical glory. So that was that. I officially had a theme - the Magic Kingdom at Walt Disney World.
Let the planning begin...

Decor
A color scheme is everything when starting to think about decor. For this party, I opted for the colors of Cinderella's castle. I didn't want it to be just another red, black, and yellow Mickey party, and when I think of the Magic Kingdom, I think of walking into the park down Main Street USA and staring straight at Cinderella's Castle. In order to really drive home a theme with your party guests, I love having printed items like welcome signs, food tent cards with names on them, and other fun Walt Disney quotes around the room. Evie from Evangeline Designs made these amazing signs for me and I was so excited about how they turned out!
 Since this is a kid's party, I didn't want to go too overboard with decor, but I did want to have a few over the top elements that make you go WOW! In addition to the disposable Mickey tablecloth that Disney sent me, I wanted nice linens for the table to match the color scheme. On Cloud 9 Event Rentals to the rescue! Lisa was so sweet and worked with us to find just the right shades to match the party's color scheme.
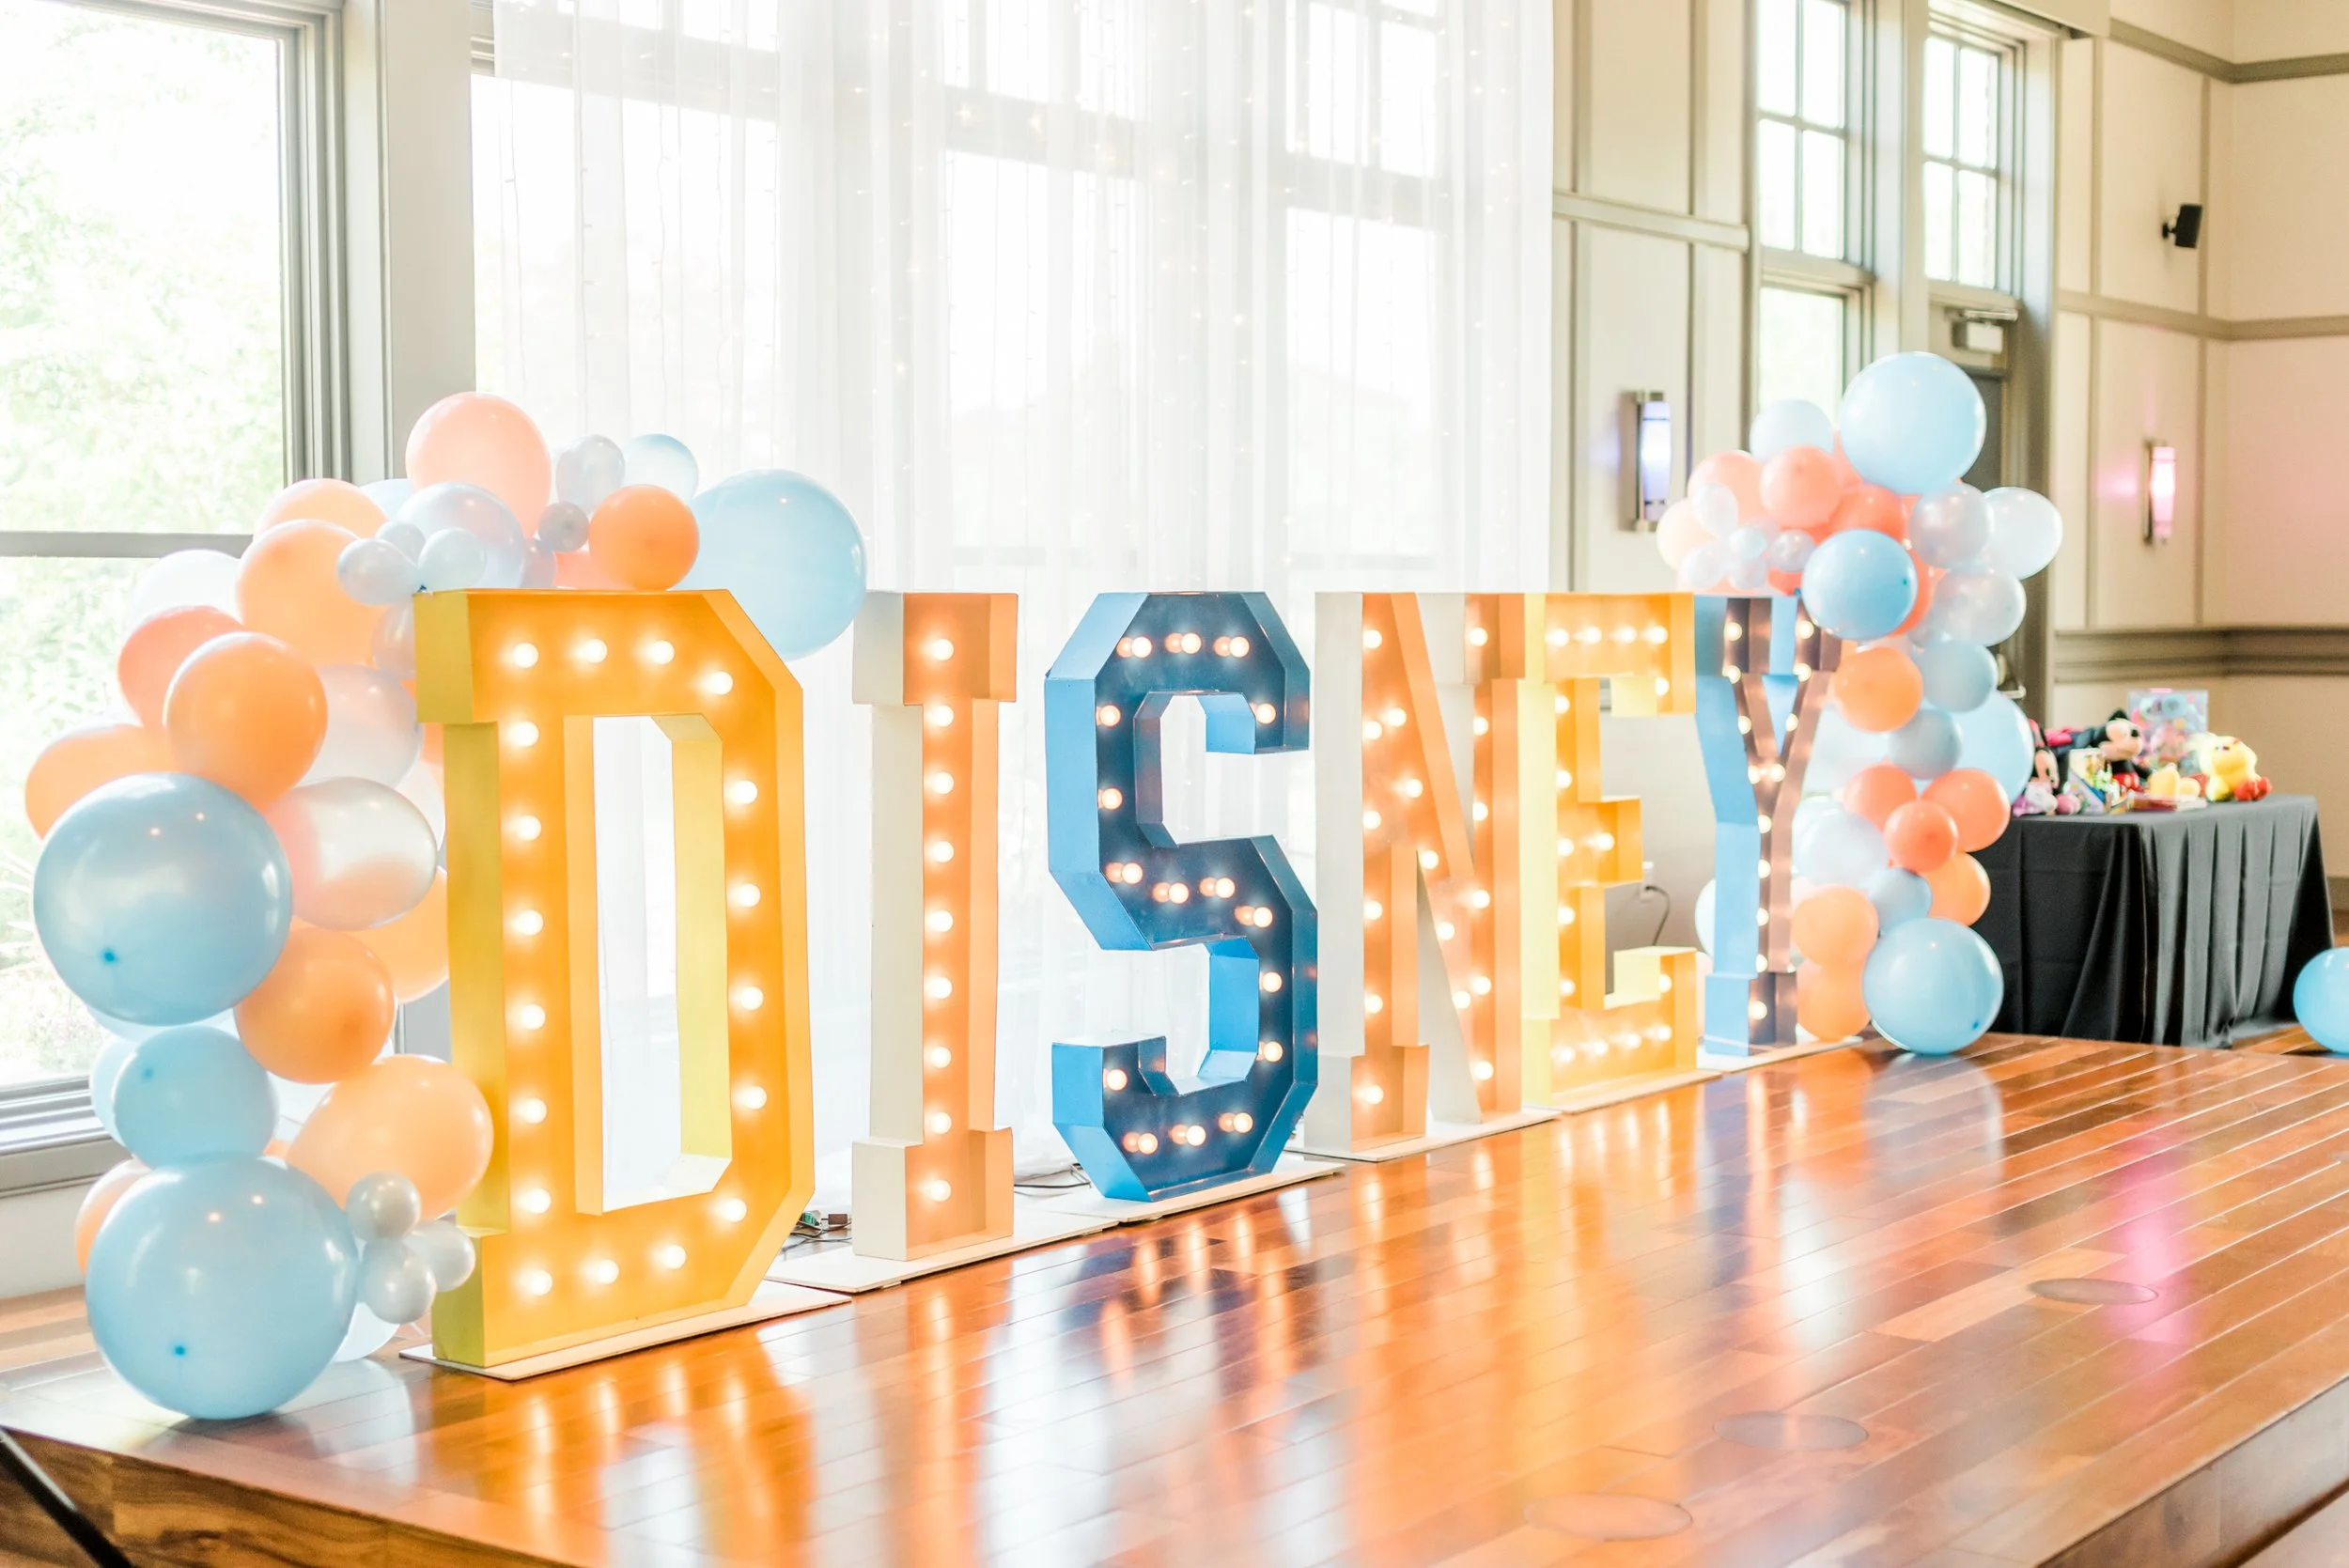
 After trying several different avenues, I just couldn't find a life-size Cinderella's Castle that looked nice. This one was cute, but it wasn't impressive enough for me. So then I contacted Designs by Yutz. Their oversized marquee letters were perfect for the look I was going for! They spelled out the word "DISNEY" and even painted the letters to match the decor of the event. Everyone loved them and they were definitely that WOW factor I had wanted! If you're wanting to recreate this look at home on a smaller scale, these 9" tall letters are perfect!
 Along with the large marquee letters, I wanted something to go around it, so balloons to the rescue! Balloons are always a super cost-effective way of adding color and wow-factor to any event. So balloons here we come! I'll have to do a balloon tutorial sometime soon so I can show you just how easy it is to make these! Toast from the Host and I made this one in about 3o minutes before the party started.
  Because I can never have enough balloons (and they make a great statement and take up space), I also used helium-filled balloons tied to weighted silver decorations to be the centerpiece on each table.
Food
A party isn't really a party without food. And when you're trying to recreate a magical place like the Magic Kingdom at Walt Disney World, the more silly and themed the better! I love a party with a theme, so even the food and utensils need to have a Disney twist!
Something Substantial
First up, "Lady and the Tramp’s" Baked Ziti & Meatballs. Spaghetti is always a kid favorite, but it's hard to serve. So I opted for Michael Angelo's Baked Ziti and Meatballs and put them in these portion-controlled cups. I also wanted to make sure to give the kids a little something more substantial than all candy and sweets, so I opted for some cheap pizzas as well. Say it's from Toy Story's "Pizza Planet" and you've got an easy to serve food with a fun Disney twist!
Snacks
Every party needs something you can graze on, like "Buzz Lightyear's Space Balls (cheese balls), the "Lost Boys Food Fight" (grapes in red and green), "Olaf's Snow Flurries" (popcorn), and Mickey's special edition goldfish. Just make sure to use some of these scoops for easy serving that kids can do themselves. Tudorhouse Cookies also made these AMAZING Magic Kingdom themed cookies and it really sent the theme over the top! She really got the magic of the Magic Kingdom summed up - Mickey ears, Cinderella Castles, and Walt Disney quotes about chasing your dreams.
 What says something magical more than sugar crystals turned into puffy clouds of goodness? Twirl Cotton Candy was there at the party twirlin' and swirlin' and creating such a fun, sugar-filled time for the kids (and kids alike). She even had cotton candy cones that looked like Star Wars light sabers and blinked!
Cake
Now, I know it's not a birthday party, but every party deserves a little cake, am I right? But since this was no ordinary party, I couldn't have just any old cake! I opted for this really cool Popcorn Cake by Popped Passion. It was fun, unique, and great for people who don't have a huge sweet tooth. I even put it on this cake stand to fancy it up a bit!
Drinks
Now, what to drink? For the kids, I opted for mini water bottles and Capri Suns. They were easy for me to just put in an ice chest (aka "Under the Sea") with some ice and the kids can open them themselves. For the adults, they had the option of the tiny water bottles or the "Mad Hatter's Iced Tea" - aka Sweet Tea - a Southern girl's party staple served in this easy to use beverage holder.
A Disney World Favorite
Last but not least, I needed the ultimate Disney World sweet treat - Mickey Bars! I found these classic Disney World ice cream treats at Target and they were the perfect "wow factor" food item I was looking for! Unfortunately, my idea of keeping them frozen during the duration of the event by putting them in a rolling cooler packed with dry ice in the bottom and regular ice on top didn't work out so well and they were all completely melted (stupid Texas summer heat!). But, if you were having this party at your home, you shouldn't have trouble at all keeping them frozen in your freezer! Of course, you have to have something eat on and with, and I knew I was going to need to supplement the amount of plates, napkins, and cups that Disney sent me, so I went to Dollar Tree and got these navy blue napkins, plates, and pink paper cups. In order to make them a little more "Disney", I bought these Mickey stickers and affixed them to the outsides of the cups. Voila! Disney! And don't forget Ariel's "Dinglehoppers" (forks).
Activities

Magic Bands & Mickey Ears.
Upon entering the party, everyone came in just like they would at the park at got their Magic Bands and Mickey Ears. Guests got to decorate their “magic bands” with stickers and parents used sharpies to write their names on their wristbands. They then got to pick out their Mickey ears or masks of choice and get on to the partying!Photos provided by Brass + Veil Creative
Dance Party.
Every party needs some tunes! And Jason from J&A Entertainment kept the party rockin' by playing everything from Mary Poppins songs to baby Shark. We might have even done the chicken dance (but you'll have to watch the video to see that one). The kids loved playing with the hula hoops and dancing away!
Ball Pit.
What kid doesn't love a ball pit? These ball pits was easy to set up, take down, and kept the kids occupied for hours! I just used these kiddie pools and filled them with these balls. Easy!
Imagination Station.
 When the kids need to calm down a bit or are more on the creative side, I love setting up craft stations at parties. When I was a kid, this was my jam! I could sit and be creative for hours (and my daughter was the same way at this party...let's just say she likes glue... A LOT). There was no real plan for this station - just give kids some craft supplies and let them use their imaginations. My son and I created a couple things myself as inspiration on the table, but I wanted to let the kids embrace their inner artists on their own. I had to make it myself, but I did get my "Cinderella Castle" after all! On the table, I had crayons, markers, glue, scissors, construction paper, pipe cleaners, popsicle sticks, plastic beads, letter beads, and twine. It was awesome getting to see all the kids' creations!
Free Printables.
We also had these fun games that came in our boxes. The fortune teller game and the matching game were both a hit with the older kids at the party! Here's the links to them if you'd like to download them for yourself:Free Printable Disney Fortune Teller GameFree Printable Disney Matching Game
Giving Back
As part of the initial box I received from Disney, Jakks Pacific gifted me a Rapunzel doll and My Pillow Pets gave me a Mickey Pillow Pet. Instead of keeping them for myself, I decided to create a "giving back" portion of the party. Since the party was a free community event, I asked that attendees bring an unopened Disney gift that would be donated to Texas Children's Hospital as part of their Disney Team of Heroes. And boy, did these families show up BIG for kids in need! It was such a blessing to be able to not only have a great event, but also to pay it forward and give some deserving kids a little magic as well!
What's New at Walt Disney World
If you can actually make it to the park, you're in for a treat! #NowMoreThanEver, Disney is making memories for younger kids even better. There are tons of new experiences like Mickey & Minnie's Surprise Celebration (Magic Kingdom), Party with Pixar Pals (Disney's Hollywood Studios), and Festival of the Lion King (Disney's Animal Kingdom)!At Mickey & Minnie's Surprise Celebration, there's also new songs, parades, character meet and greets, and Mickey and Minnie even have some festive new outfits for the occasion!I'm really looking forward to Party with Pixar Pals at Disney's Hollywood Studios! Hollywood studios is celebrating their 30th anniversary with a new logo and fun new attractions with Mike and Sully from Monster's Inc and The Incredibles. Go inside a door into the monster world or test out your superpowers! My kids are absolutely going to love both of these exhibits! And, my personal favorite, Toy Story Mania will turn everyone into toys for a day. The park has even been updated with Forky - the new Toy Story 4 star! If your kids are elementary school age, they're sure to love the Disney Junior Dance Party with Vampirina and Doc McStuffins as well.Disney's Animal Kingdom is also feeling love and celebrating the new Lion King movie set to come out this week with a Hakuna Matata Dance Party with Timon and Rafiki (my hubby's favorite).Last but not least, Epcot has some great new additions as well. The most important being that they are retiring the nighttime show "IllumiNations: Reflections of Earth." and replacing it with "Epcot Forever". At the end of it all, the kids had a blast and the parents got a break, so that's all that matters! Our magical playdate had over 40 kids attend and they even brought their parents too!
 If you're looking to see what promotions Walt Disney World has going on now, go to this link below:
If you'd like to see more party tips like this, follow me on Pinterest!

THE Ultimate Guide to all Things Magnolia in Waco, Texas

This blog post contains affiliate links. All purchases made through these links keep this blog running.
As soon as the HGTV Show “Fixer Upper” introduced America to Chip and Joanna Gaines, viewers fell in love with this couple, Joanna’s warmth, Chip’s humor, and their unique modern farmhouse style.Since the birth of their tv show, they’ve created quite a brand for themselves – and brought a lot of interest to the, once small, college town of Waco, Texas.If you’re a Magnolia fanatic, here’s the top places in Waco that you simply have to visit if you really can call yourself a fan.
Magnolia Market Silos.
This shop has it all – housewares, cooking utensils, a garden, food trucks, and an outside play area. Be prepared to spend a couple hours to see everything because every square inch of the property is carefully thought out and you won’t want to miss any of it.
Silos Baking Company.
Need something sweet to nibble on? This little shop features baked goods of all kinds and don’t forget to get some coffee to go with it. You can sit outside the shop in their patio area as well and enjoy your treats.
The Little Shop on Bosque.
This is where the original store the Gaines’ owned was. Now, it is home to their clearance items. They have great deals and you can also save an additional 10% if you show them your same day receipt from Magnolia Market.
Harp Design Co.
Clint and Kelly are woodworkers whose tables and housewares are regularly featured in Joanna’s home designs. You can visit this shop to see their quality cutting boards, tables, and take some home for yourself!
Magnolia Table.
If you have Joanna’s Magnolia Table cookbook (which I highly recommend) and want to taste some of the recipes straight from the source, then this is the place to do so. The restaurant is open from 6am to 3pm and they serve breakfast and lunch all day. Fair warning: if you don’t get there before 7am, you will definitely have a wait before you are seated to eat. But if you’re in a hurry and can’t wait, they have an outside patio and the Takeaway where you can get coffee and pastries. But I highly recommend eating there. Get the candied bacon and the biscuits with strawberry butter. You won’t be sorry.

JDH Iron Designs.
If you head to Waco and you visit Magnolia market, there's a little trailer with a white tent over on a street nearby. At that tent, you are more likely than not going to meet Jimmy Don himself. Jimmy Don has been featured on Fixer Upper with his sturdy metal signs with meaningful quotes and scripture on them. He is exactly the same as you see on television. You can also visit his full store in Crawford, Texas and see how the signs are made and a much bigger selection of signs are there as well.
Cotton Castle.
This castle was recently purchased by Magnolia Realty and is going to featured in an upcoming episode (once it's finished, that is). I can't wait to see this beautiful place restored and given the Gaines' special touch.
If you’re interested in seeing more, make sure to go to the link below to see more:
3 Tips for Your Trip to Magnolia Market in Waco, Texas
How to Make the Most of Your Drive from Houston to Waco
Need a Place to Stay Nearby?
Check out these Places to Stay in Waco, Texas If you'd like to see more tips like this, follow me on Facebook!
Do you have anything to add? Let me know in the comments below!